A couple years ago, I thrifted four white wrought iron patio chairs from Facebook Marketplace, and I was excited to give them a fresh look. I had originally tried to snag a pair at an estate sale, but they ended up going home with someone else… not worth the argument, so I moved on. Then these popped into my feed, and I instantly knew they’d be perfect for the awkward side yard spot under two big shade trees to the side of our house. I’ve been trying to make better use of that space since we moved in, and this little furniture flip turned out even better than I imagined. Click through to see the before and after images, along with my process!
Why I Love This Project
This was one of those quick weekend DIYs that brought me a lot of satisfaction. It was budget-friendly, super impactful, and honestly just a really fun change of pace from the larger renovations we typically juggle. Click through to see the evolution of these thrifted patio chairs, how I styled them in our backyard, and check out my easy painting process.

Supplies I Used
I didn’t want to spend a ton on this little corner since it’s not a place we usually hang out, so I kept the project budget-friendly. I pictured two pretty chairs with a little marble bistro table in between, to ground the space and give it some sense of purpose. If you’re thinking of doing something similar, here’s what you’ll need to revive your outdoor chairs:
- Krylon Fusion All-In-One Spray Paint, Matte Black
- Krylon Metallic Gold Leaf Spray Paint
- Iron Patio Set (mine is obviously thrifted, so I’m unable to link it)
- Outdoor Patio Seat Cushions
- Masking Tape
- Marble Bistro Table

How I Gave These Chairs a Whole New Look
Step 1: Clean and Prep
First, I gave all four chairs a good wipe down. They looked clean, but I always like to start with a fresh surface before painting. These were in great shape structurally, just not quite my style yet.

Step 2: Add Gilded Details
Next, I used Krylon’s Metallic Gold Leaf spray paint on the finials and scrolls. I wanted that traditional, timeless gilded look, and tested a few golds before landing on this one…

I had a pretty specific look in mind going into this project. I really wanted that classic French aesthetic, adding a gilded style. This paint totally nailed it and gave me the polished gold leaf finish I was hoping for.

Here’s a closer look at the gold leaf. So pretty, right? After giving the can a good shake, I sprayed on two to three coats over the finials and scrolls. Then I let everything dry overnight before moving on to the next step.

Step 3: Paint the Frame Matte Black
I knew I wanted the chair frame to have that classic wrought iron look, so I went with Krylon’s Fusion All-In-One Matte Black.

This one’s a paint and primer in one, which means no extra priming and no sanding needed. That alone saved me so much time. It sticks to tricky surfaces, works great outdoors, protects against rust, and holds up really well. It covered everything I was looking for in a spray paint- especially for outdoor patio chairs.

Here’s my biggest spray painting tip: stick with thin, even coats. It makes all the difference. I used about two cans per chair and gave each one two full coats. These chairs were a bit of a time commitment thanks to the detailed lattice design. I had to spray from every possible angle to get full coverage. Since I was working with four chairs and wanted to let them dry properly between coats, this project ended up being a full weekend task. Ready to see how the before and after?

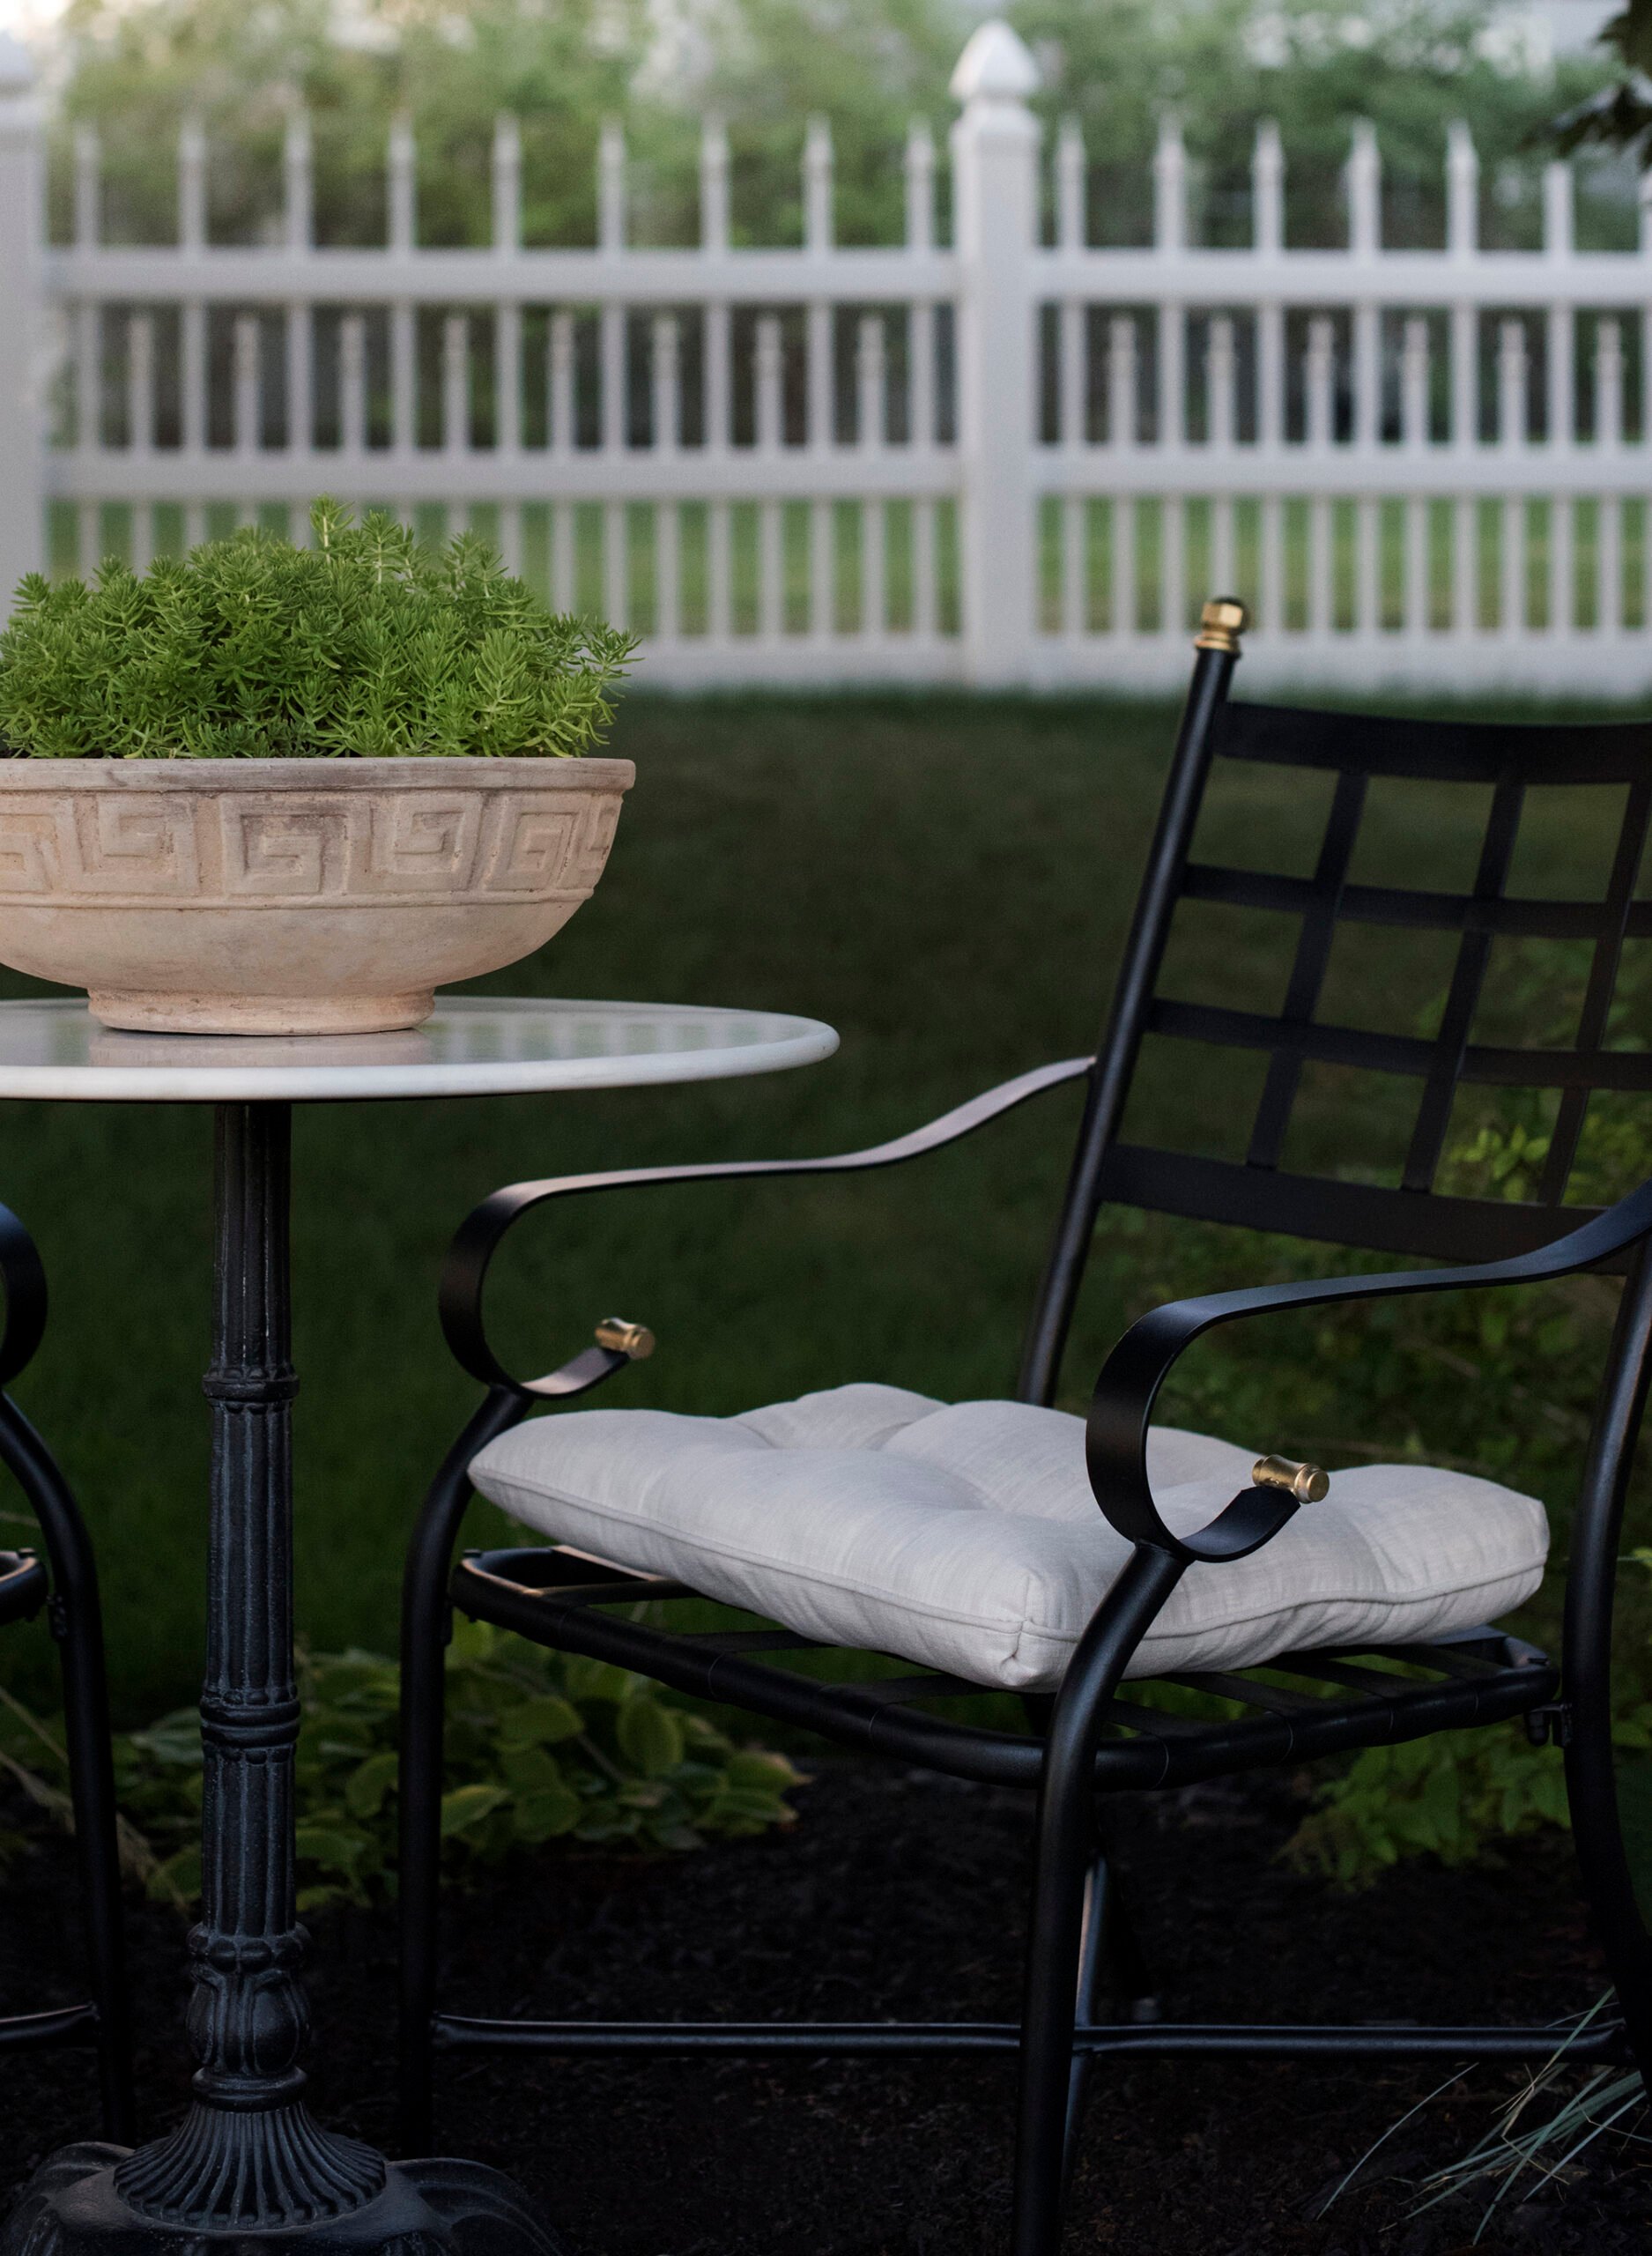
Pretty simple and sophisticated, right? I’m really happy with how these turned out. It was an easy, budget-friendly project that helped this part of our yard feel more connected to the rest of our home and aesthetic.

Styling the Finished Space
Once the paint dried, I added some simple outdoor seat cushions and paired the chairs with a marble bistro table I swiped from our bedroom balcony. It’s such a pretty setup now and fits the classic look of our home exterior… much better than the old broken bench that used to live there. I even added one of my old Greek key stone planters to pull the vignette together. I didn’t expect to use this area much, but Emmett and I sat there the other evening and realized it’s actually a great spot to enjoy the view.

Expert Tips for Spray Painting Furniture
- Always clean your furniture before painting.
- Shake your paint can vigorously and apply in light, even coats.
- Allow each coat to dry fully before moving on.
- Use painter’s tape to protect any contrasting details- like I did with the gold.
- Don’t rush the drying time, especially if you’re working with detailed furniture.
For more tips and visuals, be sure to give this post a read: tips for a durable, professional looking spray paint finish. I’ve revived plenty of furniture over the years!

Storage and Care Tips
- Spot clean the cushions as needed or bring them in when not in use.
- If you’re using these outdoors (like I am), try to keep them covered or stored during bad weather.
- Touch up paint if any areas chip- especially after winter storage… although a few years in, may have held up well (with no chipping).
- Keep the metallic areas dry to prevent any tarnish or weathering… or embrace the patina!

FAQ
I always look at the frame first. If the shape is classic and the structure is solid, no cracks or major rust, I’m usually in. Minor issues like scratches or faded paint are fixable with a little elbow grease- especially when I have a specific design vision in mind.
I usually do two light coats, sometimes three if the piece has a lot of angles or texture. For these chairs, the lattice design meant I had to spray from every direction to get full coverage. Thin coats are key to avoiding drips and getting that smooth, even finish… and don’t hold the nozzle too close!
Yes, always! Even if something looks clean, there’s usually dust, pollen, or grime that can affect how the paint adheres. A quick wipe down with a damp cloth or a bit of dish soap and water makes a big difference and helps the finish last longer.
Related Posts
Looking for more creative ways to use paint at home? I’ve shared some other furniture transformations that might inspire your next project! I’ll link a few favorites for you below…
- A Quick Sofa Table Makeover
- Small Coffee Table Makeover
- A Bar Cart Furniture Makeover
- Demilune Table Makeover
- A Brass Chiavari Chair Upholstery Makeover
- DIY Pedestal Makeover

This was such a satisfying little project. The paint made all the difference, and now this unused corner of our yard looks polished. I’m really glad I took the time to add those gold details, too. If you’ve been putting off a similar project, I say go for it. It doesn’t have to be expensive or complicated to make a space feel more refined. Let me know in the comments if you’ve ever flipped patio furniture!

The post Patio Chair Makeover appeared first on Room For Tuesday.