Cut flower garden. This is a sub-category of garden that, if you had asked me about three years ago, I wouldn’t have even understood, let alone imagined someday having. But three years ago, when we moved from New York City to eight-plus acres in Bucks County, Pennsylvania, and set about not only caretaking but working to improve the gardens that were now part of our domain, our super-gardener friend Stephanie declared in a tone that conveyed obviousness, even inevitability, “Well, of course you’ll have to plant a cut flower garden.”
For the uninitiated like myself, a cut flower garden is like a vegetable garden but for flowers—not for decoration but for service. I suppose that more elaborate cut flower gardens are meant to service florists or weddings or even roadside stands. But in our case, our cut flower garden services our dining table and our bedside tables and my desk and anywhere else we need that bump of indoor summery joy around our home.
Fast-forward to a year after Stephanie’s suggestion and, indeed, we planted a cut flower garden—resplendent with zinnias, cosmos, dahlias, bells of Ireland, snapdragons, gomphrena, purple hyacinth beans, and more. But there was a problem: Cut flowers are supposed to grow tall—for, ahem, those big tall giant vases that we don’t have—and that means you have to support the plants. And the way that most people create cut flower garden supports, according to our gardening friends as well as the internet, is with a combination of heavy green garden stakes and twine. You pound the garden stakes into the ground at regular intervals, say, three to four feet apart, and then wind twine between the stakes so that you end up with a series of twine boxes with Xs crossing diagonally. Do this lower to the ground and higher up along the stakes and, Bob’s your uncle, that’s that.
Except Bob is apparently not my uncle, and the twine grid method, for me, wasn’t that easy or workable for three reasons. First, as a baseline, I’m not fantastically skilled at winding or tying twine in such a way that it stays taut and in place. So what initially looked like a sharp twine outline of a peanut butter and jelly sandwich expertly cut into triangles by a very anal retentive parent on school lunch duty inevitably looked, just a few days later, like said sandwich had been left at the bottom of a knapsack for weeks. Second, it never looked good. Even where I occasionally managed to get the twine taut, the giant green metal stakes stood out like sore industrial-ish thumbs pocking the landscape of the otherwise lovely natural-looking flowerscape. And third, hard though it had been to achieve this deeply imperfect twine-stake situation—and, indeed, I had spent hours setting it up—I was gutted by the realization that I’d have to eventually take it all down. And then do it all again next year. And so on and so on. Ad infinitum. Forever.
All this effort for something that didn’t work, that looked garish, and would require repeating every single year? Nope. And this is why I built a series of custom flower support grates and bases for them to rest on. Here’s how I did it.
Photography by Sally Kohn.
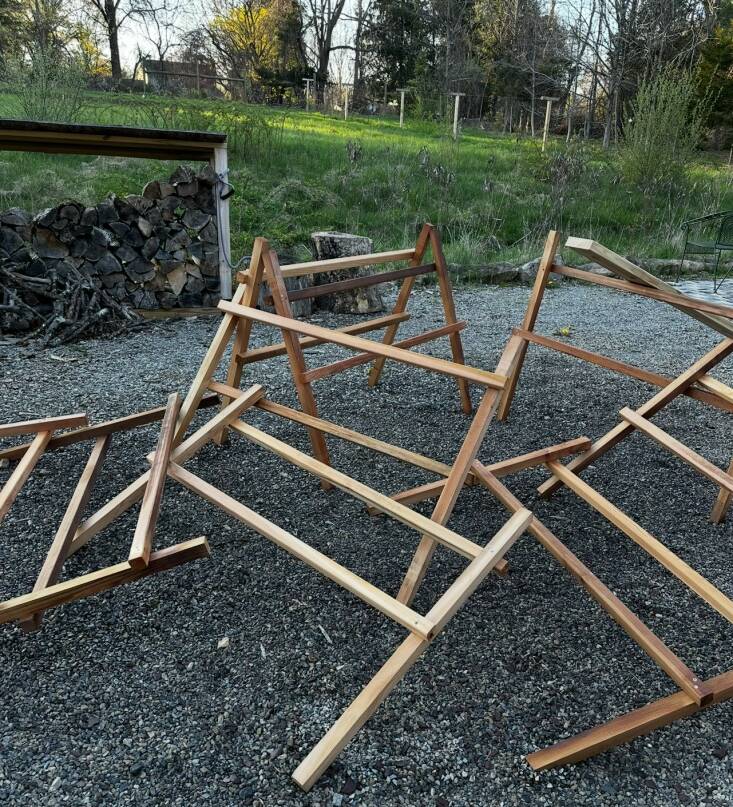
Above: My initial batch of crossbar “ladders” drying after oil. I used cedar 2x2s. I prefer cedar because I love spending an arm and a leg on garden projects. No really, I picked cedar because of its durability outdoors and because it matches our home and garden décor generally.
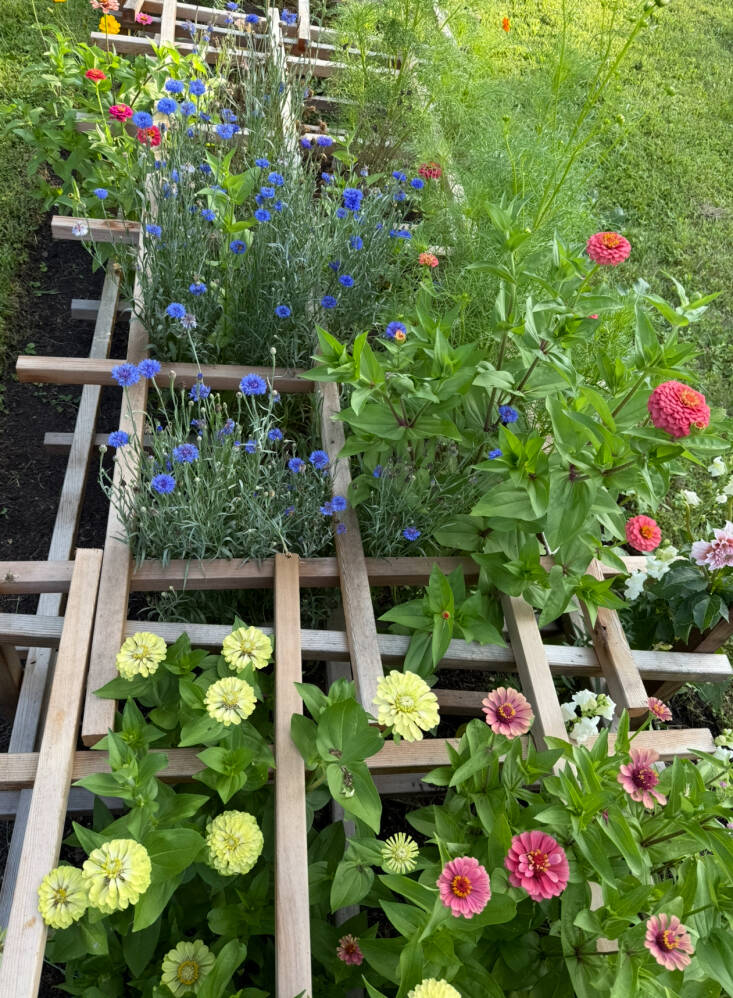
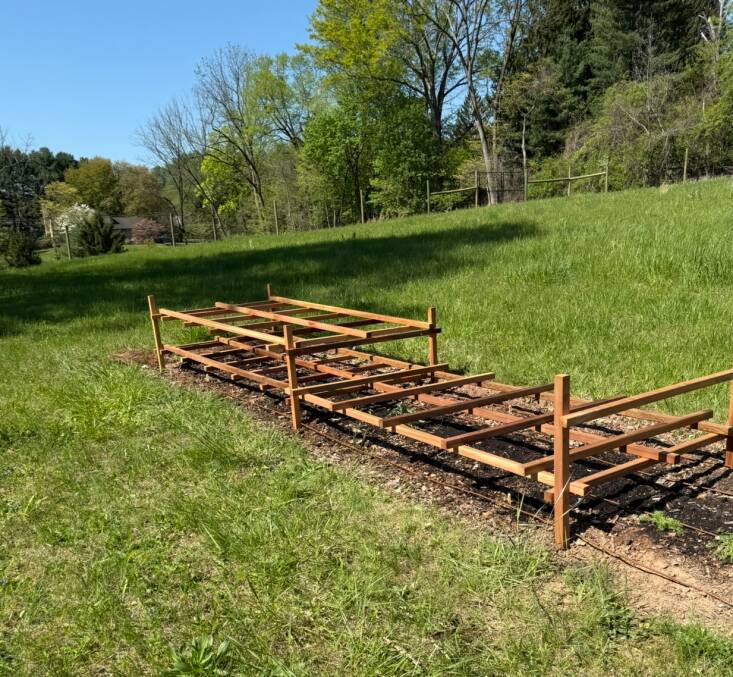 Above: Our cut flower garden is massive—about 50 feet long and 3 feet wide. The “ladders” are 3 feet wide. Each ladder has two cross pieces, one about 6 inches from the ground and the other near the top of the ladder, so that each part of the garden bed gets a lower and an upper grate.
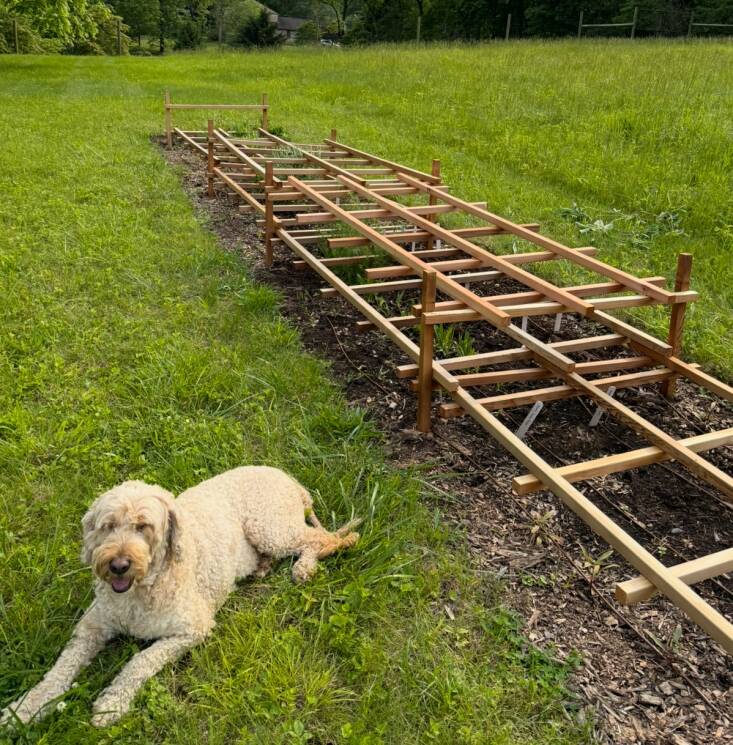 Above: The project coming together, with help from Sadie Pig. Lumberyards generally stock cedar 2x2s in 3 feet, 4 feet, 6 feet and 8 feet lengths—but most will be happy to help with cuts if you need them. Since I was working with a large bed, I used 8-foot and 3-foot 2x2s to create the grates (my ladder supports were planted 7 feet apart).
 Above: I used two stainless steel screws at each joint (other screws might stain the wood eventually) and pre-drilled the holes as cedar can be finicky. I absolutely love Ryobi’s power tools, and the Ryobi brushless cordless drill will serve you well here. When finished, I sprayed all the pieces with Real Milk Paint’s Outdoor Defense, my favorite non-toxic outdoor wood preserver. A post hole digger, rubber mallet, and level were very helpful for getting the ladders in the ground.
 Above: Late summer blooms. I realized a bit too late that if each ladder cross-piece was going to have two grates resting on it, the spacing of the length-wise cedar pieces for the grates would have to vary so they could nestle next to each other instead of on top of each other on the ladder bars.
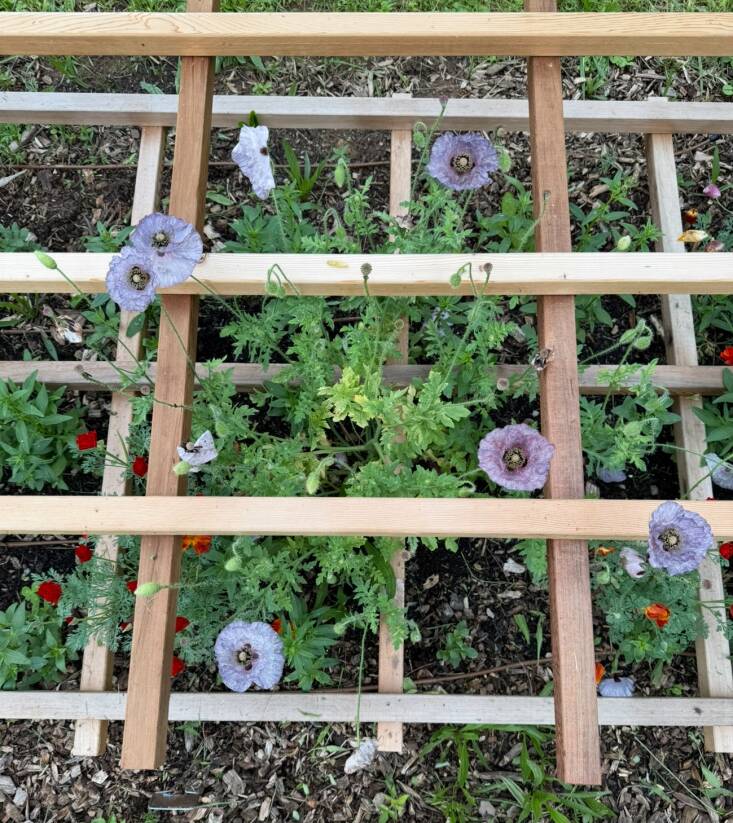
 Above: Once the flowers grow taller, the grates nearly disappear.
 Above: Early fall explosion. Note to self: get more vases.
I’m pleased with how they turned out. They did their job supporting the flowers all season and looked elegant doing so. And bonus, at the end of the season I’ll just remove the grates and store them but leave the ladders in the ground. Next year, since I placed the ladders a bit higgledy piggledy at first, I’ll be laying down a plumb line with string and moving them so that they’re more lined up and leveled. Then the whole setup will look even better.
More from Sally:
- The Year of Magical Lighting (or How I Nailed My Outdoor Lighting Scheme)
- Cooking with Fire: If You’re Not Grilling Over a Real Fire, What Even Is the Point?
And find Sally’s home renovation posts over on Remodelista here.