I used to plant live boxwoods, juniper, and pine this time of year. I would try to finish my winter window boxes in late October or early November. The last 4-5 years, instead of shopping to find live plants (which always seem sold out by the time I get to it), I resorted to realistic faux greenery… that way the boxes aren’t empty all winter long until April. If you’re interested to see how I assembled my winter window planters, click through! I’m linking everything and am sharing the faux greenery I used, which is pretty convincing. I’m glad I found an alternative and was able to make it work. They look lush, layered, and classic… and the best part? Zero maintenance. No watering, no worrying about freezing temps, just easy, elegant winter curb appeal. Let me walk you through exactly how I pulled these together so you can recreate the look at home!
If you missed our shed build, check out this post! I get a lot of requests for a link to buy the shed or pre-fab kit, but I’m proud that we built this ourselves to fit our needs and aesthetic. It’s a fun post, if you’d like to go back and see how the shed came to fruition!
Why Choose Faux Greenery for Winter Window Boxes

After experimenting with both live and faux greenery over the years, faux has become my unexpected winter MVP. Here’s why:
- It lasts through harsh weather… wind, snow, and freezing temperatures don’t faze it.
- No watering or upkeep, which feels like a luxury in the middle of January.
- It’s reusable year after year. Mine still look new, after five years of use.
- You can create structure and fullness without relying on the availability of winter plants at your local nursery.
- These are easy to style- especially if you mix different textures, like cedar, pine, fir, juniper, and boxwood.
What You’ll Need for This Project


I’ll be sure to link everything for you below. To create full, realistic window boxes, gather a mix of faux greenery stems and a few anchor pieces:
- Realistic faux cedar or juniper topiaries
- Faux boxwood picks (perfect as a dense base layer)
- Faux pine branches or pine sprays
- Faux fir stems for added texture
- Smaller pine or cedar picks for filling gaps
- Floral foam, soil, or packing peanuts to stabilize stems
- Outdoor zip ties or wire
- Optional: ribbon, pine cones, winter berries, or battery-operated light
Click directly on each item within the collage to shop!

01: faux wreath (similar) // 02: ribbon // 03: faux potted juniper // 04: faux potted cedar // 05: faux pine pick // 06: faux pine branches // 07: faux branches // 08: faux boxwood bush
I bought a random assortment with good reviews and everything ended up looking pretty nice in person. I have three boxes to fill every year; all are attached to the shed. Here’s my step-by-step process…
Step-by-Step: How to Style a Winter Window Box with Faux Greenery
1. Prep the Window Box
Once my summer florals die off at the end of October, I empty the window boxes completely… soil and all. You can also opt to keep the soil to help anchor stems. These have had live plants nestled inside them, so they could use a good cleaning. However, given the cold temperatures, I just go for it and deal with cleaning the boxes (and windows) in the spring. Filling the empty boxes is the main concern, because let’s be real- everything is going to be covered in snow soon, anyway.

2. Anchor Your Biggest Pieces First
I set up a folding table in our yard, unbox everything, and get started. I always like to begin with the largest plants first. Start by placing larger topiaries or taller sprays toward the back, I try to create height and shape a silhouette that frames the arrangement. I place the boxwood picks first, because they’re on the larger side. The boxwoods were budget-friendly and weren’t quite as convincing as some of the other faux greenery, but it did make for an excellent base. They really just act as filler. I’m probably more sensitive to their overall look & feel as well, because we have boxwoods planted directly beneath the window boxes… therefore it’s pretty obvious which is real and which is faux, since it’s essentially a side-by-side comparison. On their own, they’re great!


3. Add Texture and Fill In Gaps
Now that the fuller greens created a dense foundation, tuck stems tightly together, letting some spill over the front for a natural, cascading effect. Then, add some of the smaller and individual pieces of greenery anywhere the arrangement needs depth or movement. Mix in pine, fir, and any long-needle picks you have. Vary the length and angle. I just shoved it in haphazardly, but if you’re having trouble criss-crossing the branches to firmly secure them, you can always use florist foam or recycled packing materials to fill your planter boxes before adding greenery… that way the ends have something to stick into. Just keep layering until you get the look and fullness you’re aiming for!

4. Secure and Fluff
You may want to secure the arrangement by using zip ties to fasten smaller branches to heavier stems. Then fluff the branches & greenery. In nature, evergreens don’t grow perfectly straight, symmetrical, or uniform, so be sure to bend them in all directions to soften edges for a more realistic look. I’d also recommend bending a few of the branches downward to break the grid and make the planter box look more full… so it tapers over the edge.

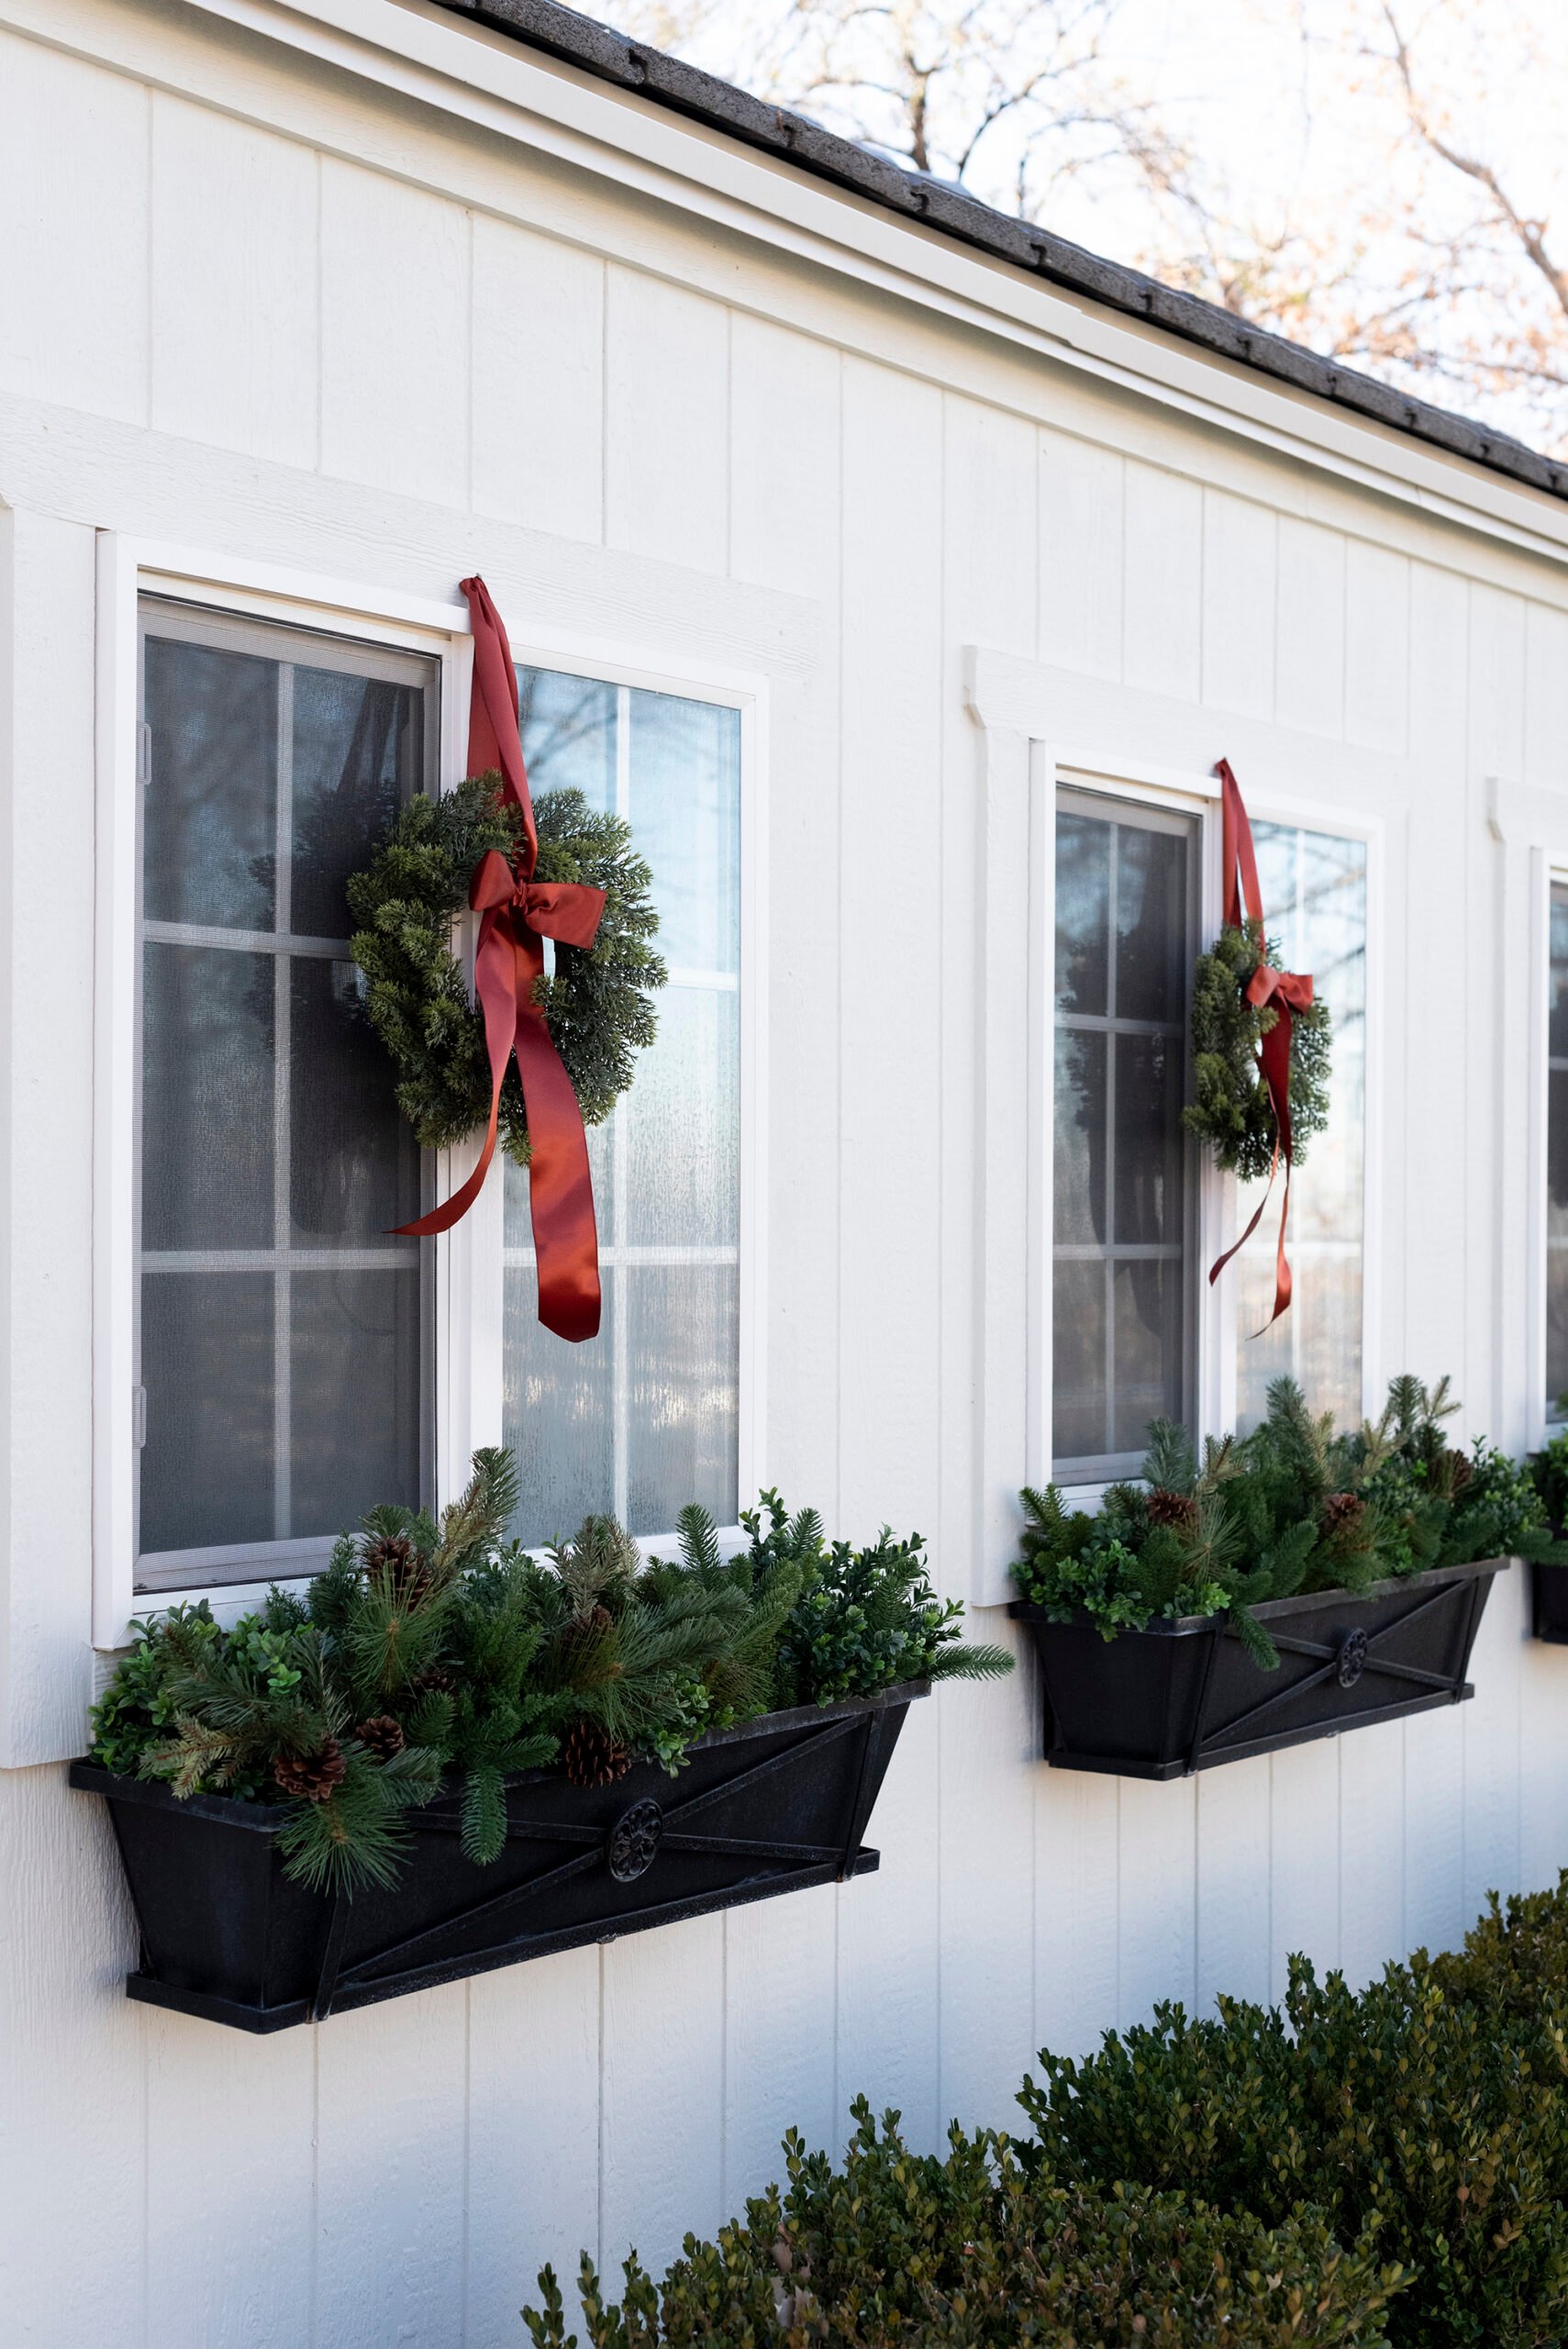
5. Style with Optional Seasonal Touches
I also pulled some old faux wreaths out of storage to adorn the windows… because why not, it’s the holiday season! They make our shed look so charming. I kind of wish we would’ve thought to put holiday lights on the shed (since it’s looking cute for Christmas), but maybe next year. You can keep things winter-neutral or lean into holiday by adding some of these ideas:
- Satin ribbon or a bow
- Soft white holiday lights
- Subtle winter berries

Designer Tips for a More Realistic Look
- Mix at least three types of greenery for a layered, high-end result.
- Don’t skip the downward drape- it softens the entire arrangement.
- Avoid symmetry that feels too perfect; offset heights for visual interest.
- Choose UV-resistant greenery to prevent fading through the season.

FAQ
Layer multiple types of stems, bend branches naturally, and mix tones and textures. Avoid anything too shiny- matte greenery reads more like the real thing.
Absolutely… just choose UV-protected, outdoor-safe stems. Mine have held up beautifully through heavy snow, high winds, and freezing nights. This is our 5th or 6th year using these.
Insert stems deep into soil or florist foam, then use zip ties or wire to anchor taller pieces. This keeps everything in place through storms.
Yes! Fresh pine or cedar can be added for fragrance or seasonal flair. Just place the live greens toward the front and replace them as needed.

Related Posts
Looking for more winter DIY and styling inspiration? I’m going to link some reader favorites below.
- How to Make an Orange Topiary Centerpiece for the Holidays
- Timeless Holiday Greenery You’ll Use Every Year
- Holiday Mantel Styling: 5 Classic Looks
- My Go-To Resource for Custom Holiday Cards
- Classic Holiday Cookie Boxes & Packaging Ideas
- 10 Holiday Front Door & Porch Decorating Essentials
- Amazon Christmas Tree Review (Styled 3 Ways)
- 20 Ways to Decorate with Ribbon This Holiday Season
- Equestrian Inspired Christmas Tour: Living Room
- Classic Monochromatic Gift Wrap
- Annual Holiday Gift Guide

I’m really pleased with how these turned out, and I’m especially happy that the planter boxes are no longer empty. Are they the real thing? No, but they look really nice. Emmett is equally as impressed with the switch to faux greenery… saving us from planting, replanting, and watering. These have held up well and I think it’s a great solution. Creating a winter window box with faux greenery is one of the easiest ways to elevate your exterior during the cold months. It’s classic, low-maintenance, and adds just the right amount of charm when everything else outside feels dormant. I hope this inspires you to give your own window boxes a little seasonal refresh- tag me if you create one! I’d love to see what you put together.
Let me know if you have any questions about the faux greenery in the comment section below! I think we’re finally ready for the snow to start falling over here. We’re officially entering holiday mode in our household.
The post Easy Winter Window Box DIY with Faux Greenery appeared first on Room For Tuesday.