I love when a DIY project turns out looking way more expensive than it actually was. This is one of those projects! We reupholstered the bed in our guest bedroom and I’m super happy with how it turned out. I photographed the entire process to create a tutorial for you. In an effort to repurpose the existing bed that lived in this room, we worked with what we had and used the same frame and rails. All of the details are in the post, but it went smoothly and the result is gorgeous. Click through to see how we transformed our old guest bed and get the scoop on my DIY upholstered headboard…
Ok, let’s do a before… this is what the bed looked like before- maybe you remember it from our previous guest bedroom, pictured below, at our old house? It was a great looking, sturdy bed, but it didn’t fit my vision for this room after we renovated.
Why Upholster Your Bed?
If you’ve ever shopped for a custom upholstered bed, you know the price tag can be steep. My plan was to switch up the fabric, adding some pattern, and create a bit of drama with a unique shaped headboard. You can catch my initial design plan here. When beginning this room, I had purchased a custom bed and was planning to sell or donate our existing bed. Long story short, my bed got delayed, the wrong bed shipped, I ended up canceling the order altogether, and decided to up-cycle the bed we had. This bed project cost us $300… it looks strikingly similar to the one I had initially ordered, which cost around $2k- and that was just for the headboard alone. I’m calling this a major win! Here’s where we started…

Ready for the process? It was honestly pretty easy! It just took a bit of patience, a few basic tools, and the right fabric, to create something that feels every bit as luxe as the designer versions. You can find the supply list below:
Supplies and Tools
- Existing bed frame with rails (similar)
- Batting (cut to size)
- Staple gun & air compressor
- Staples
- Upholstery-weight fabric (mine came from a local shop) linking similar option
- Scissors
- Dust cover cloth
- Wood glue
- Super 77 spray adhesive
- Staple remover
- Clamps
- MDF or plywood
Designer tip: Go for a heavier, textural fabric… think performance velvet, linen-blend, or even a small-scale pattern. It will feel elevated and timeless.
How to Upholster a Bed (Step-by-Step)
Step 1: Design and Cut Your Headboard
After some careful measuring, I determined the size and shape I wanted the new headboard to be. Here’s the big confession: for the sake of time, I sketched it out in CAD and sent it over to Emmett at work, and he cut it out on the CNC router. You can easily trace your design onto plywood or MDF and cut it with a jigsaw though.

Step 2: Assemble the headboard
We wanted our headboard to have some depth to it… it’s about 3 inches deep. Therefore, Emmett cut out an outline of the headboard, knowing that we’d glue and nail it to the backside… giving the impression that it has depth, while keeping it lightweight.

We used wood glue and finishing nails to tack the outline to the back of the headboard. We also included a couple braces for additional support. Again- this is totally optional… I just liked the look of a thicker headboard, so we layered the material. It’s a trick that makes the headboard feel more custom and layered.

Step 3: Adhere the batting to the board
I dug out some very old Super 77 to spray on the particle board to help hold the batting in place. This step is critical in keeping your headboard wrinkle free! It will also prevent it from sagging over time. We used clamps to help with this process, while smoothing it out. Apply it to the board and smooth the batting across the surface to prevent wrinkles. Clamp it down while it sets, this helps keep everything tight and professional. Batting helps soften hard edges, don’t skip that step.

Step 4: Cut off the excess batting
Once the batting is totally stuck and secure, you can begin trimming the excess, around the perimeter. We cut it pretty close to the edge, for a nice clean look.

This part always feels satisfying. The spray adhesive was especially helpful in holding the batting to the edges, where it wraps. It should look something like this!

Step 5: Prep your fabric
Next, prep your fabric by making sure it is facing the appropriate direction, determine the pattern, and scale everything out. Once you have it planned, you can rough cut it. Before cutting, make sure your pattern direction is correct and the repeat is centered. This is one of those “measure twice, cut once” moments. If you’re using a patterned fabric, align the pattern at each joint for a seamless look.

Step 6: Upholster the headboard
We began stapling at the top center of the headboard and worked our way to the edges. Pulling the fabric tight, and being carefully not to distort the linear pattern in our fabric, we continued stapling around the perimeter of the headboard. Take your time smoothing fabric; small wrinkles can show once the bed is assembled.


Step 7: Cut off the excess fabric
Once the fabric is stapled to the headboard, clean up the backside by trimming any excess fabric.

Your finished headboard should look something like this, pictured below. Next, we’ll move onto upholstering the bed rails.

Step 8: Upholster the rails
The rails are very quick and easy to upholster. Following the same steps, staple the fabric to the rail. We actually ended up upholstering directly on top of the original velvet fabric. We didn’t even worry about adding new batting. It saved time and turned out beautifully.

When upholstering the rails- if you’re using a patterned fabric, make sure your pattern aligns where the rails connect. We made sure to upholster each rail in the same way, using the exact pattern repeat. Alignment and little details like this make a piece of furniture feel custom, high-end, and thoughtful.

Step 9: Attach the dust cover
Once all of your fabric has been stapled, it’s time to add the black dust cover for a clean, finished look. Cut the dust cover fabric to size and staple it over the upholstery fabric on the backside, concealing seams, any uneven lines, or excess fabric- giving a polished, professional feel.

Step 10: Assemble the bed
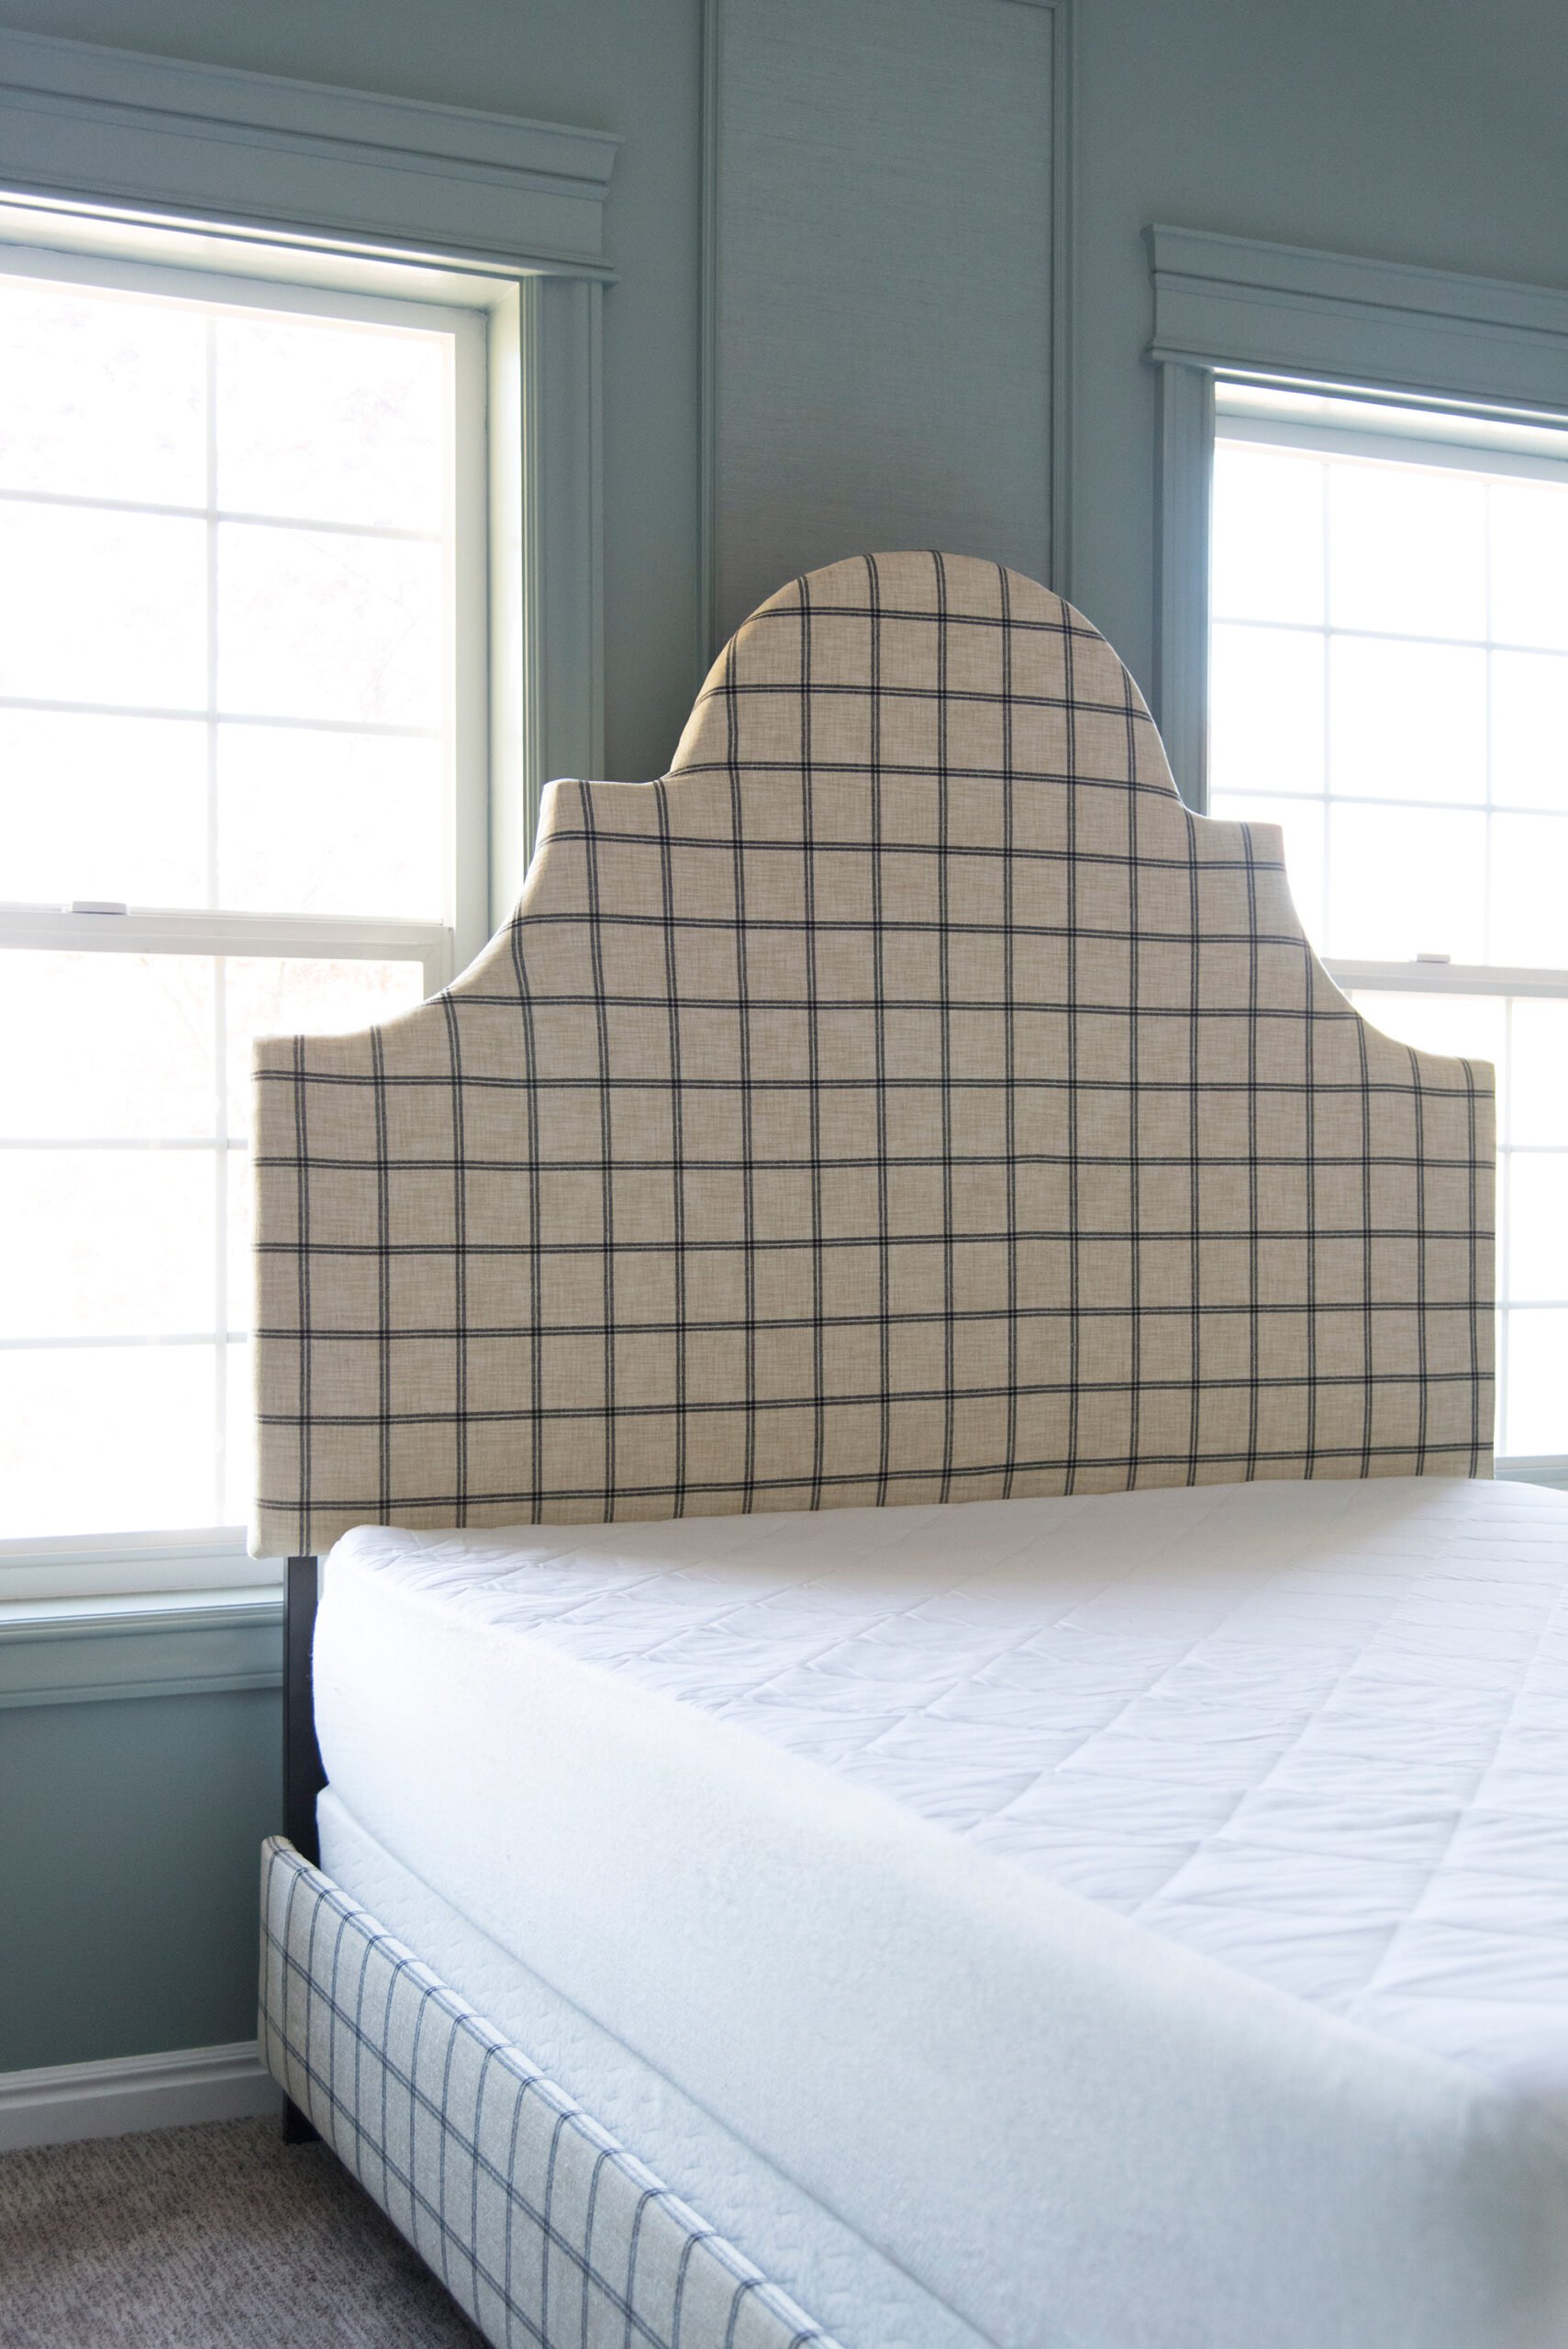
Once everything is upholstered, reassemble the bed- reattaching the rails and the new headboard. It turned out really beautiful and looks wonderful in the space! I love the height the headboard adds.

The Finished Look
I couldn’t be happier with how this one turned out. The fabric added just the right amount of pattern and texture, and the shape feels so much more intentional than our old frame. It’s sturdy, comfortable, and fits perfectly with the rest of the room’s design direction.

Emmett and I both agreed, this was one of those “why didn’t we do this sooner?” projects. If you’ve been thinking about updating your bed, this is a fun weekend project that makes a huge impact without blowing your budget.

FAQ
I love performance velvet, linen-blends, or even textured cotton. Stick with upholstery-weight options for a polished finish.
Yes! As long as the existing fabric is smooth and secure, you can go right over it.
Medium-weight batting is perfect… it gives enough cushion without making the bed bulky.
Plan for an afternoon. We knocked ours out in about five hours start to finish.

Related Posts
Looking for more inspiration and ideas for updating your bedroom? I’m going to share some reader favorites below. I hope these are helpful!
- Best Affordable Bedding for a Designer-Looking Bed
- My Go-To Formula for Styling a Bed
- Designer Picks: The Best Bed Frames from Wayfair
- My Top Bedding Picks from Brooklinen
- 20 Ideas for Making a Basement Bedroom Feel Cozy on a Budget
- Timeless Tips for a Bedroom Refresh Without Renovating
- 20 Things Every Bedroom Should Have (According to A Designer)
- How to “Train” Readymade Curtains
- How to Hang Artwork in Front of Curtains

I’d love to hear your thoughts on our guest bed! I’m incredibly happy with how it came together. Sometimes the most rewarding designs come from working with what you already have- and making it better. Emmett and I are both thrilled we saved a lot of money, and it looks and feels intentional, timeless, and completely custom in our finished guest room. Let me know if you have any upholstery questions. If you give this project a try, tag me on Instagram– I’d love to see your version!

The post How to Make a Custom Upholstered Bed appeared first on Room For Tuesday.