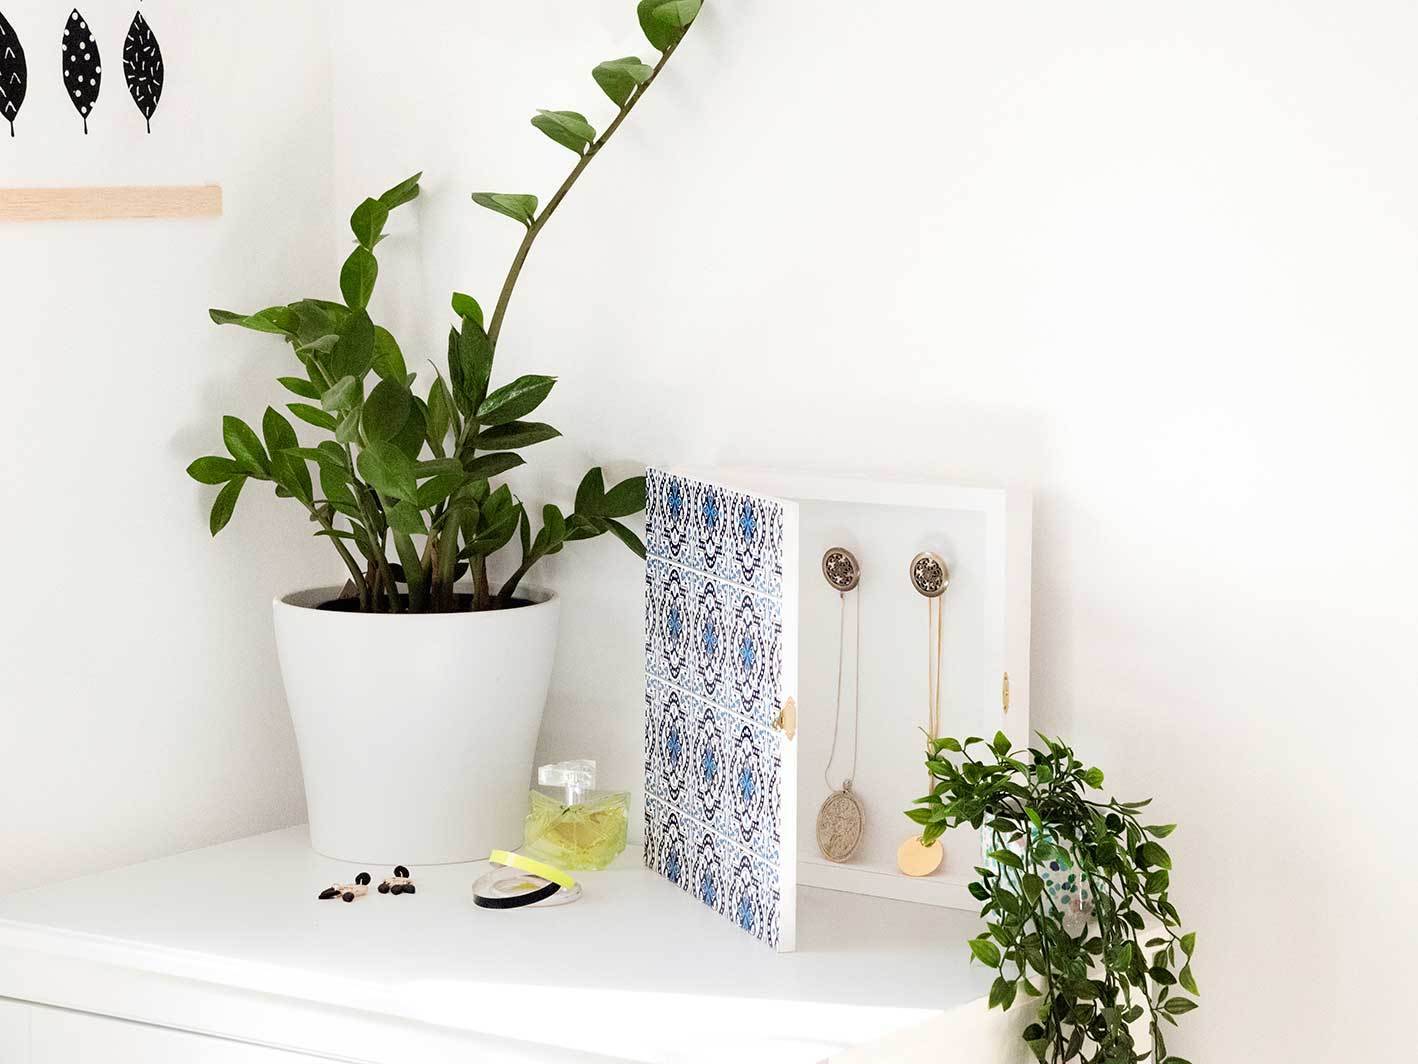
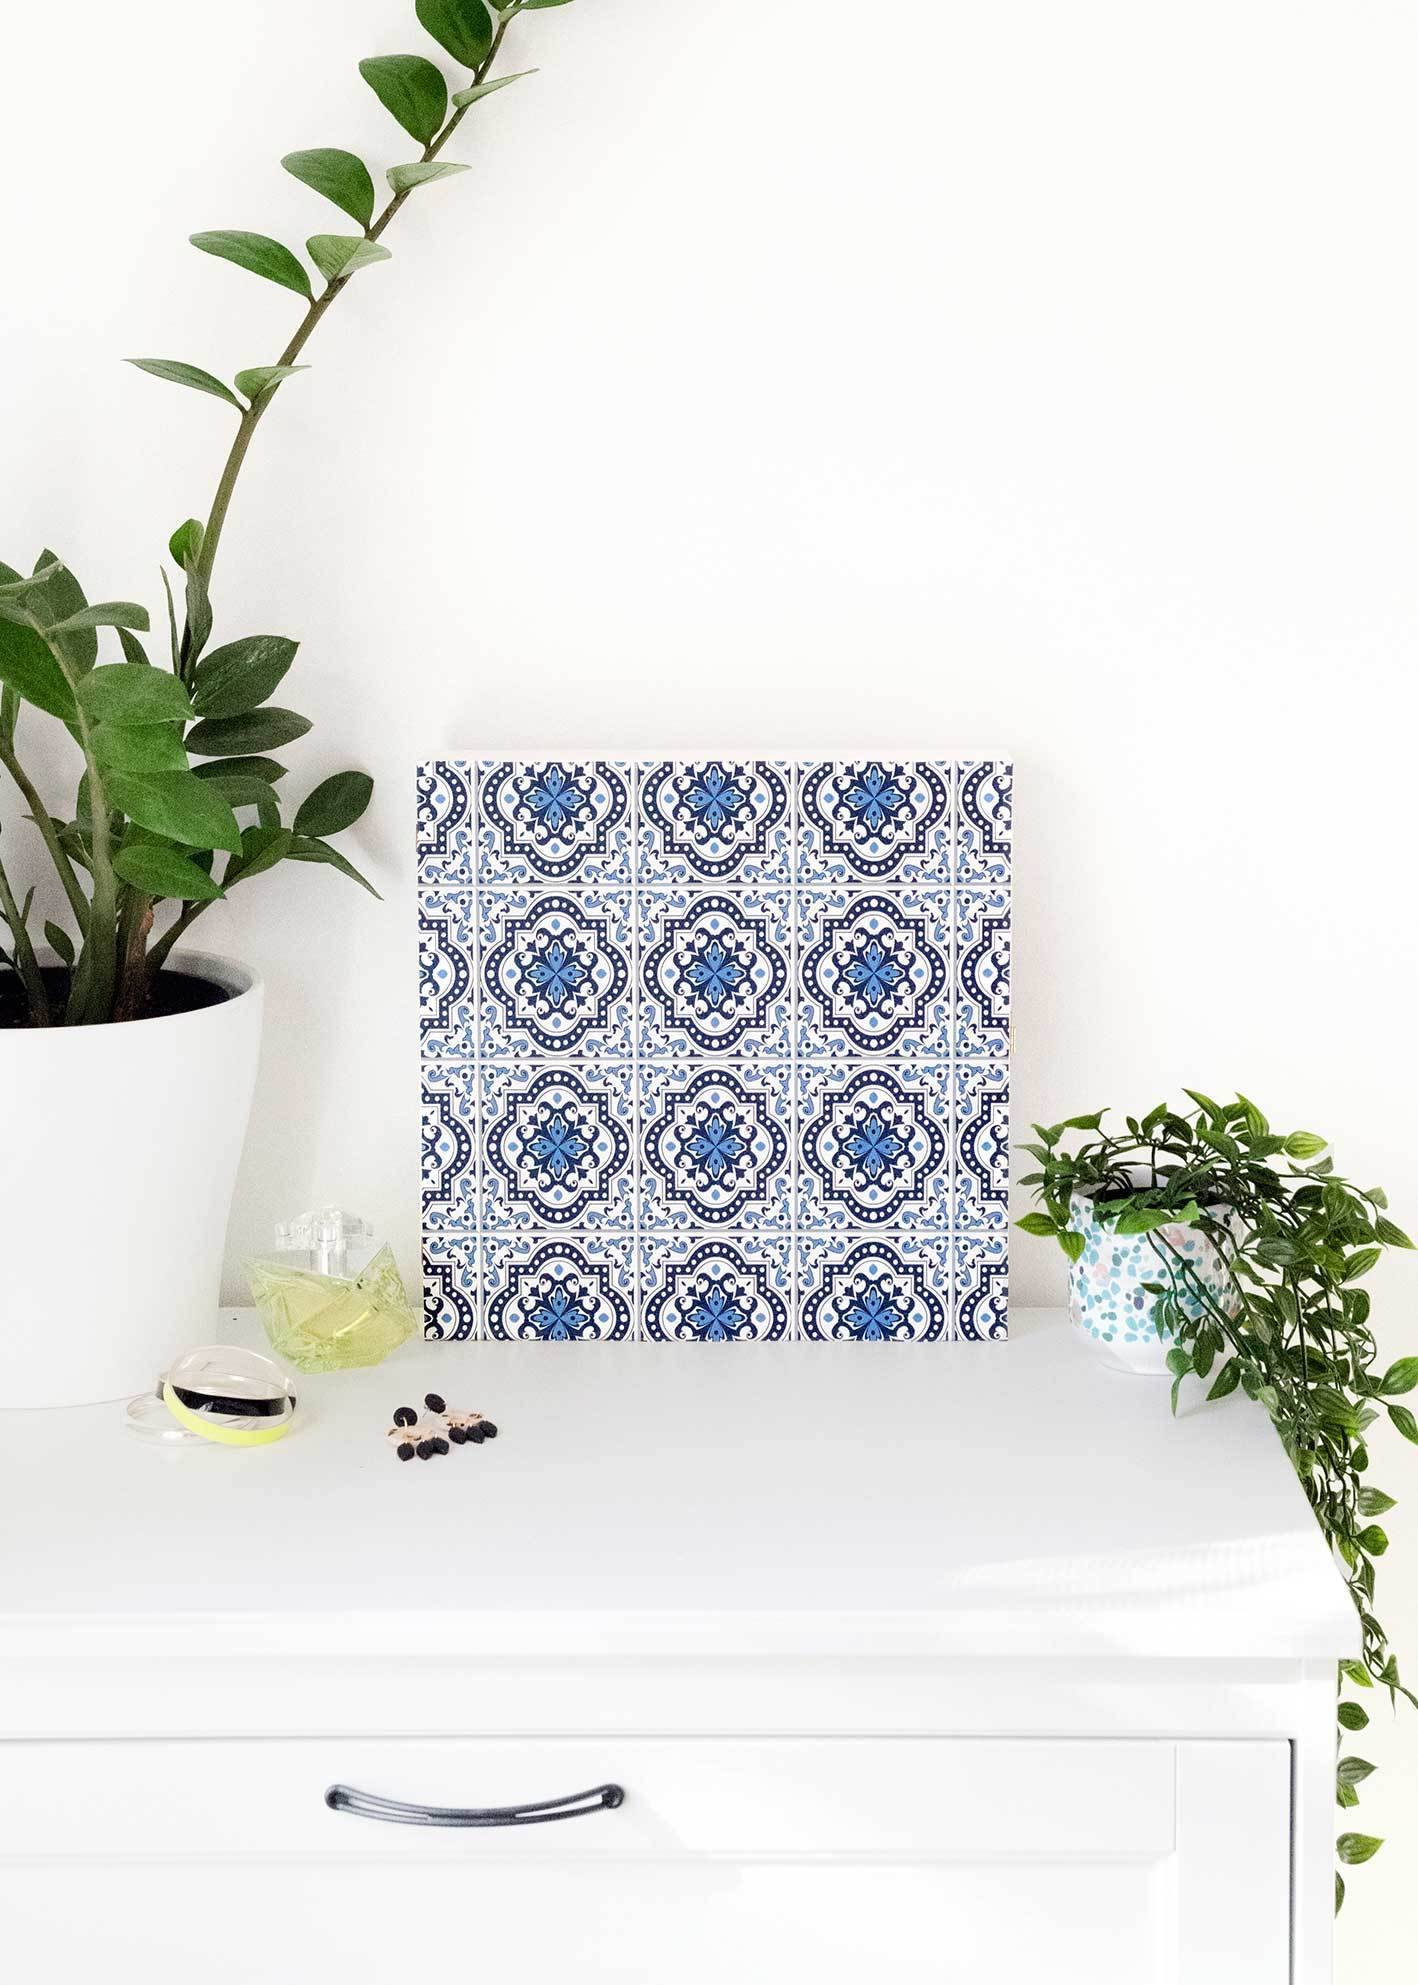
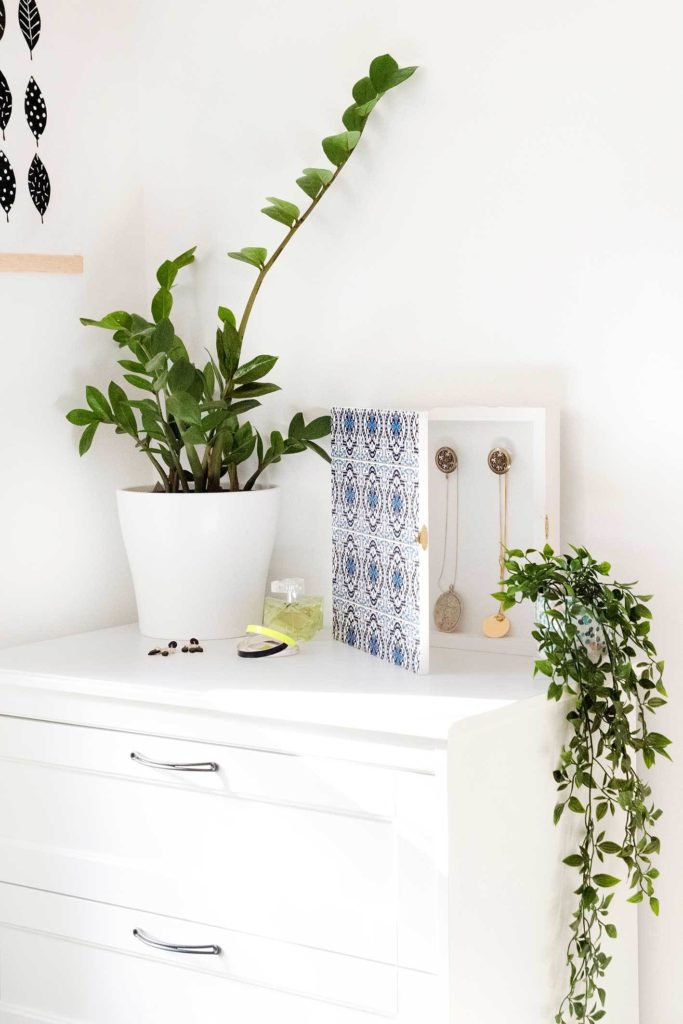
This art wall organizer provides functional storage while adding a beautiful decorative element to your walls. It’s the perfect solution for keeping your bedroom looking polished while keeping all your jewelry organized and accessible.
Those adorable little jewelry holders shaped like cacti and porcelain animals are undeniably cute, but let’s be honest, they don’t always hold much.
If you’ve got more than a handful of necklaces, you probably know the struggle of watching your favorite pieces overflow onto your dresser, getting tangled and covered in dust.
Why This Art Wall Organizer Works
This clever DIY project solves multiple problems at once.
The hidden storage keeps your bedroom looking clean and clutter-free, while the shadow box design protects your jewelry from dust and tangles.
You can customize the front to match any decor style, from modern geometric patterns to vintage florals.
It’s perfect for small spaces where every square inch counts, and it’s a budget-friendly alternative to those expensive jewelry armoires that take up valuable floor space. Best of all, when the door is closed, no one will know it’s anything more than a pretty piece of wall art!
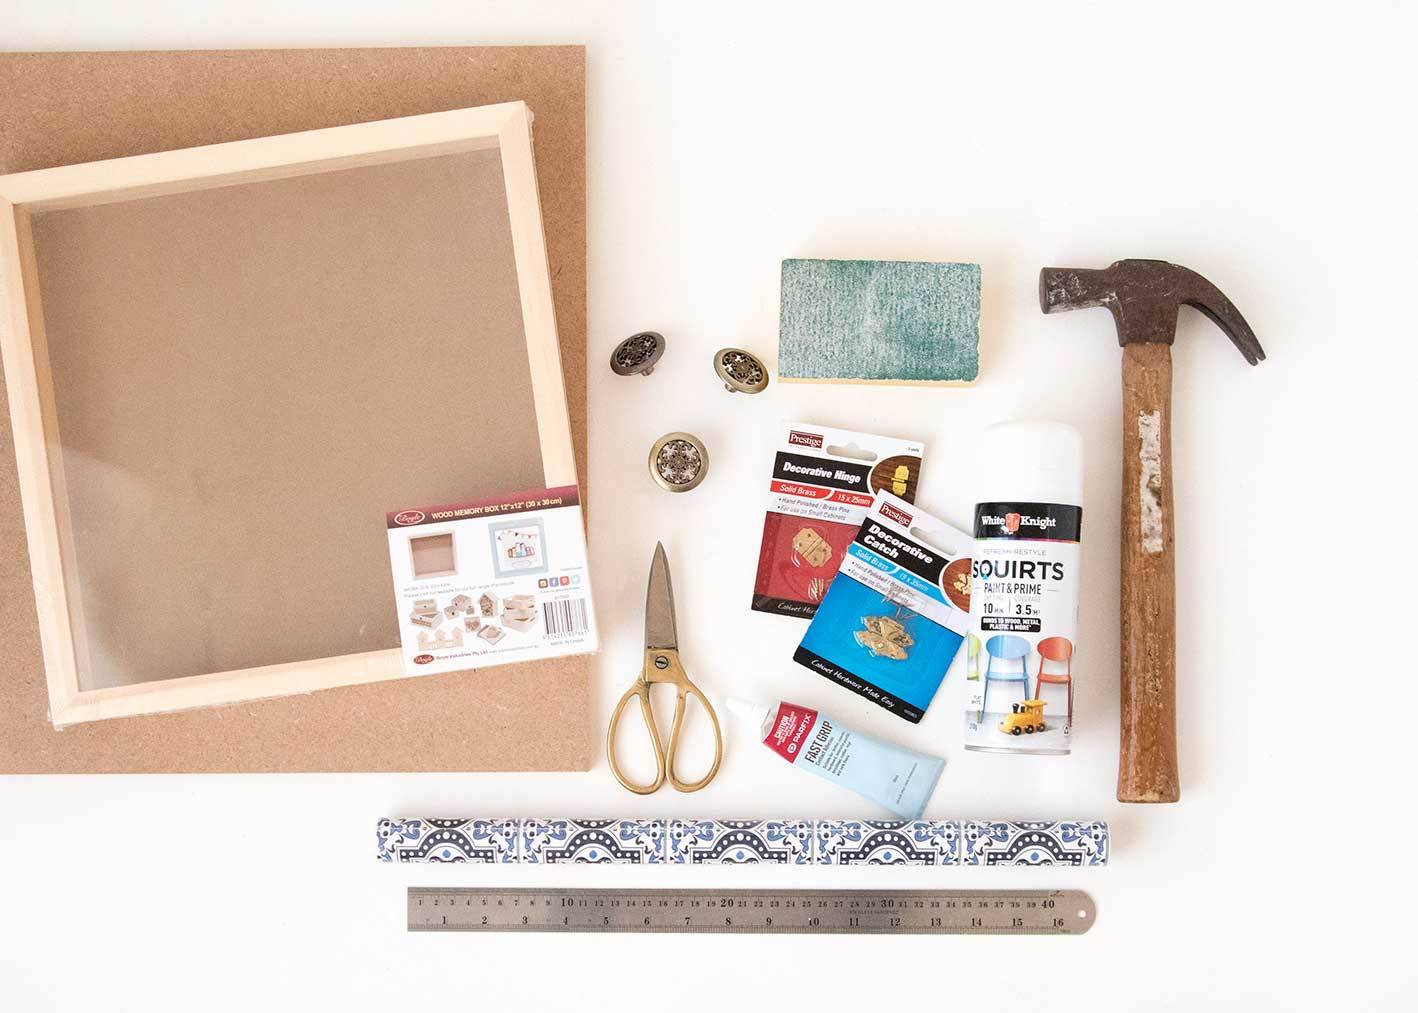
Materials You’ll Need
- Wood shadow box frame
- MDF board
- Decorative contact paper or wallpaper
- 2 small hinges
- Jewelry box clasp
- Hooks or small decorative knobs
- Primer and white paint
- Sandpaper
- Saw
- Glue or strong adhesive
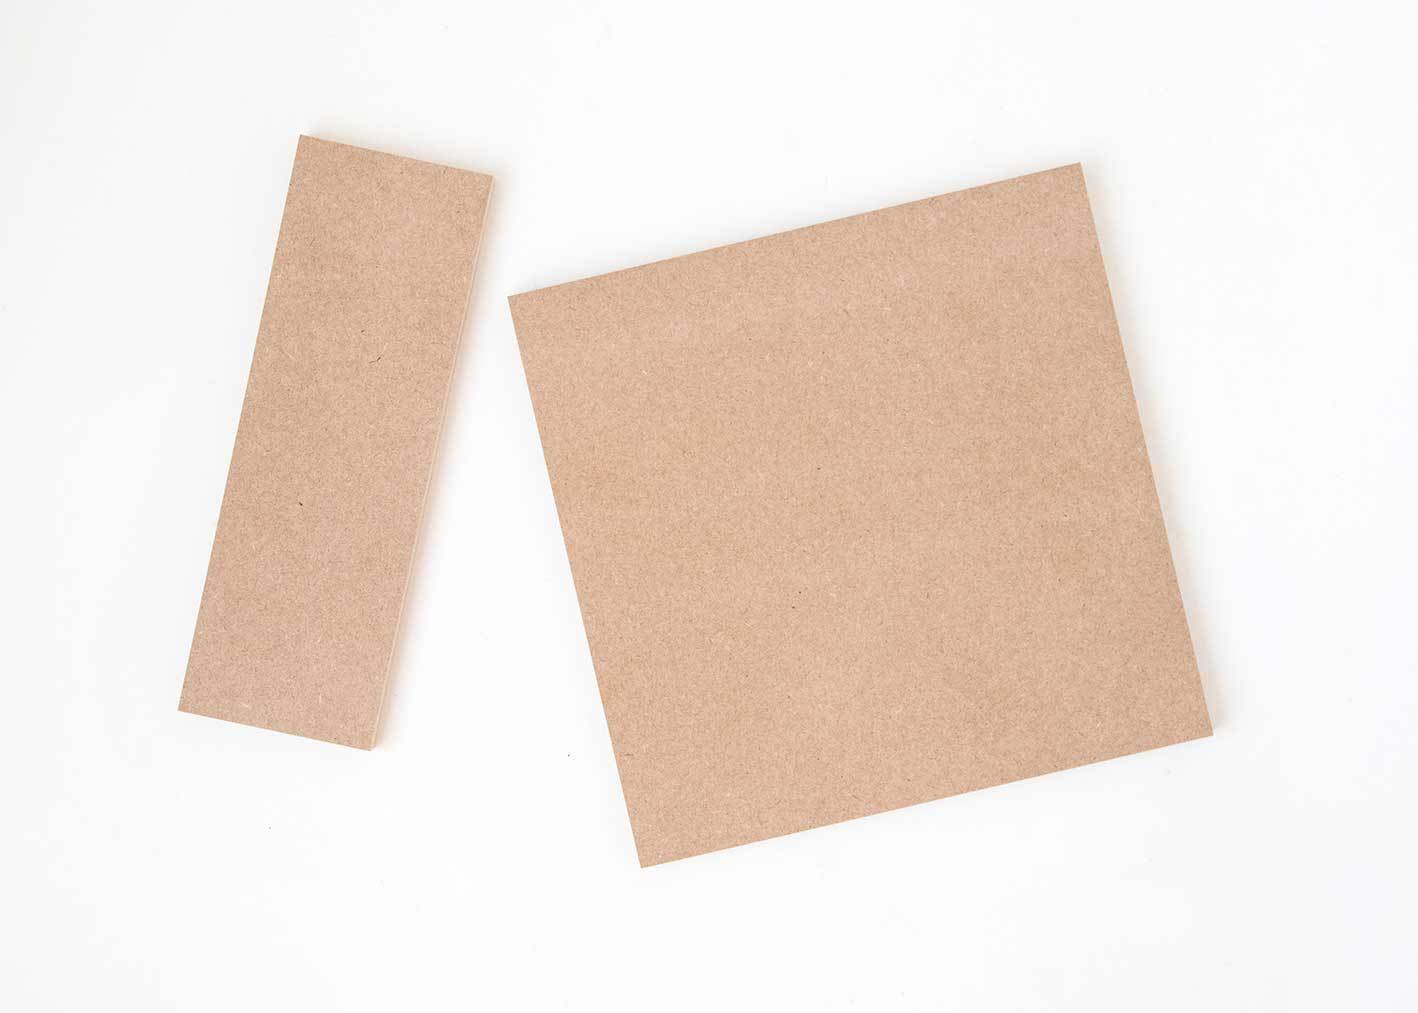
Cut and Prepare the MDF Door
Start by measuring your shadow box frame carefully. Cut the MDF board to match these exact dimensions—this piece will become the door that conceals your jewelry storage.
Remove the glass from the shadow box frame and set it aside (you can save it for another craft project!).
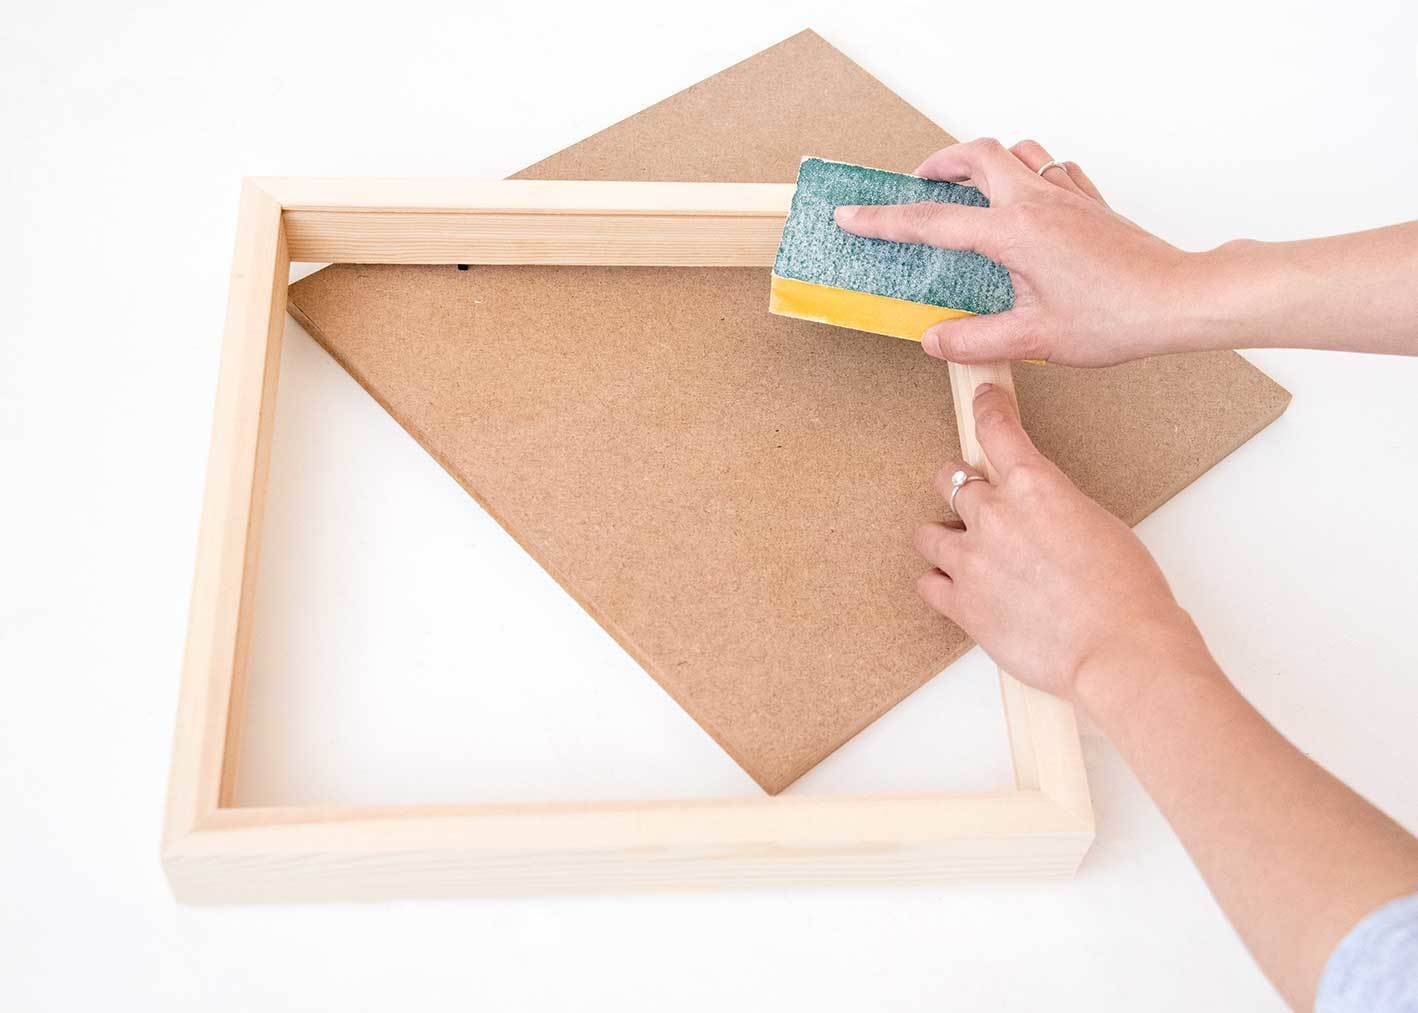
Sand both the frame and the MDF board until they’re smooth. This step is important because it helps the paint adhere better and gives you a professional-looking finish.
If you don’t have woodworking tools at home, don’t worry—most hardware stores offer free cutting services. Just bring your shadow box frame measurements with you, and they’ll cut the MDF to size.
Prime and Paint
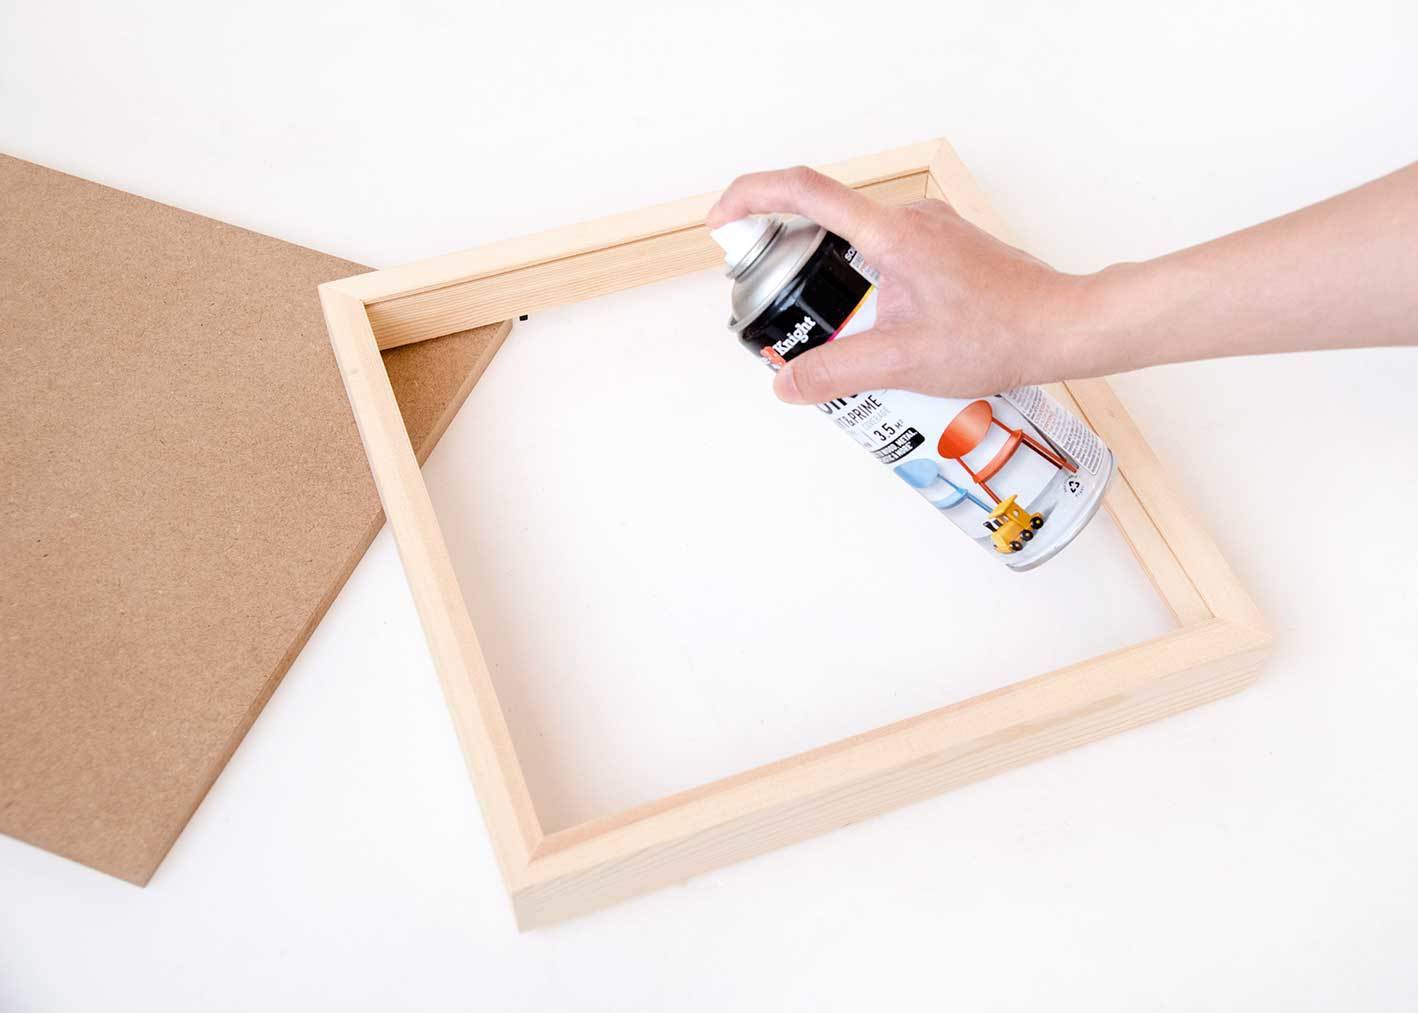
Apply a coat of primer to both the shadow box frame and the MDF board. Primer is especially important for MDF because it’s porous and can absorb paint unevenly without it.
Once the primer is dry, paint both pieces with your chosen color. White creates a classic, clean look that works with any decor, but you can absolutely choose any color that matches your room!
Let the paint dry completely between coats. If you want to add a vintage touch, you can lightly distress the edges with sandpaper after the final coat dries.
Attach the Hinges
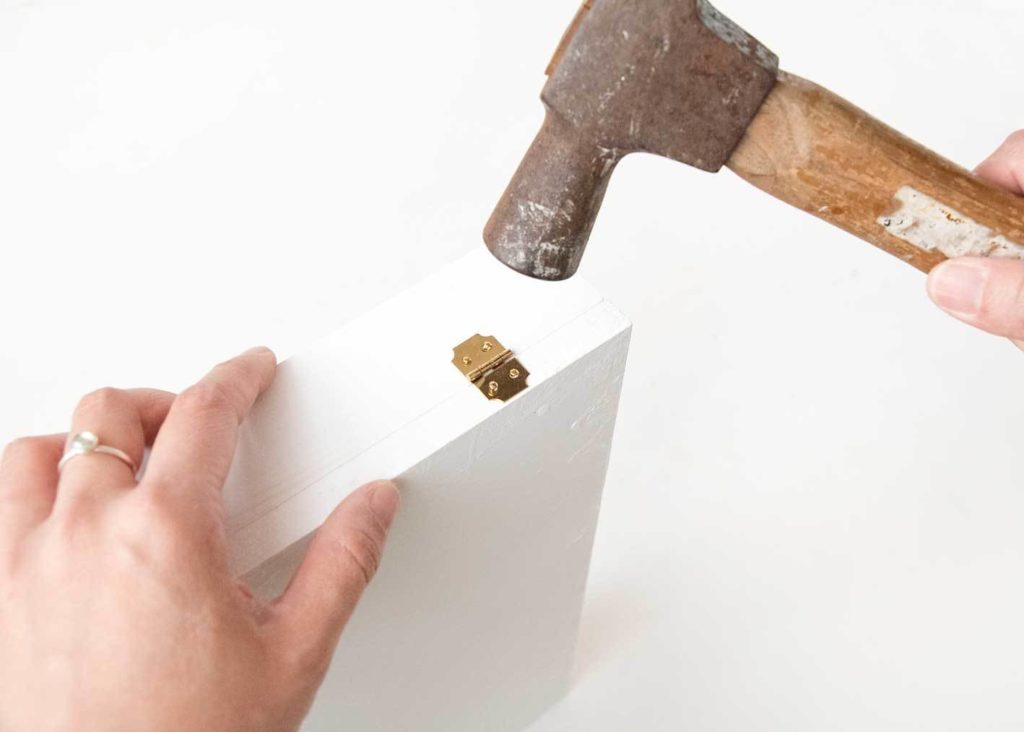
Position two small hinges evenly spaced along one side of your shadow box frame. Before you attach them, it’s a good idea to pre-drill the screw holes to prevent the wood from splitting.
Carefully attach the MDF door to the frame using the hinges, then test that the door swings smoothly.
If your door sticks or doesn’t close evenly, try adjusting the hinge placement slightly. This is one of those steps where taking your time really pays off—you want your art wall organizer to open and close smoothly for years to come.

Add the Clasp
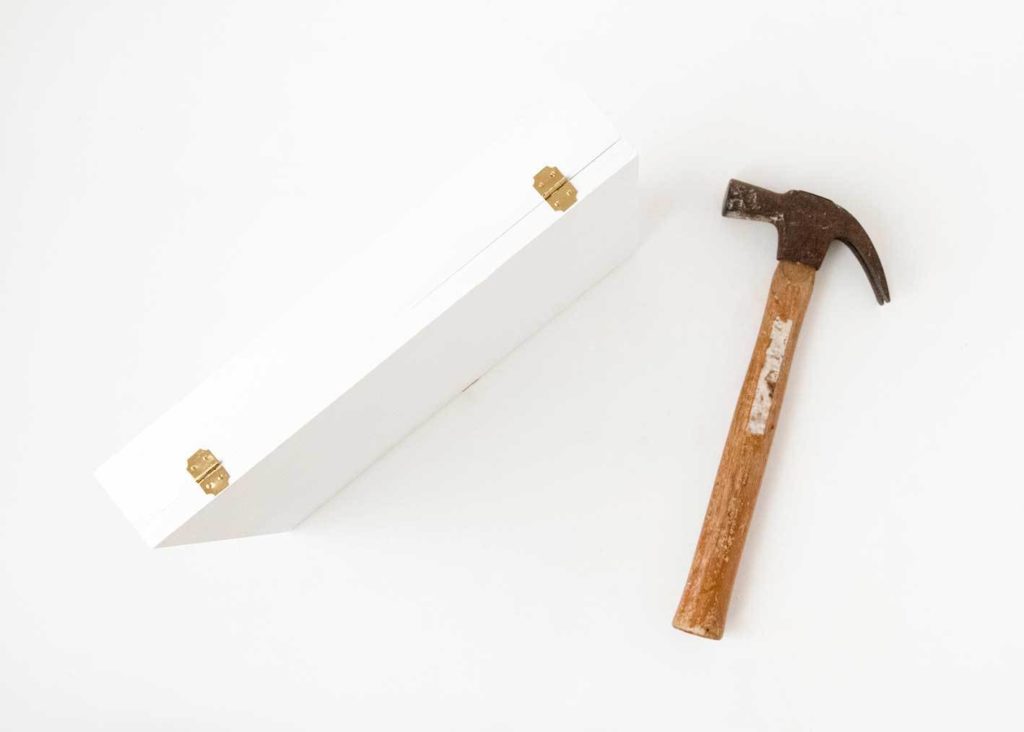
Install a jewelry box clasp on the opposite side from the hinges. Center the clasp so the door closes evenly and stays securely shut when filled with jewelry.
Magnetic clasps work great as an alternative if you prefer a cleaner look. Make sure whatever clasp you choose is strong enough to hold the door closed when it’s loaded with your jewelry collection.
Decorate the Front
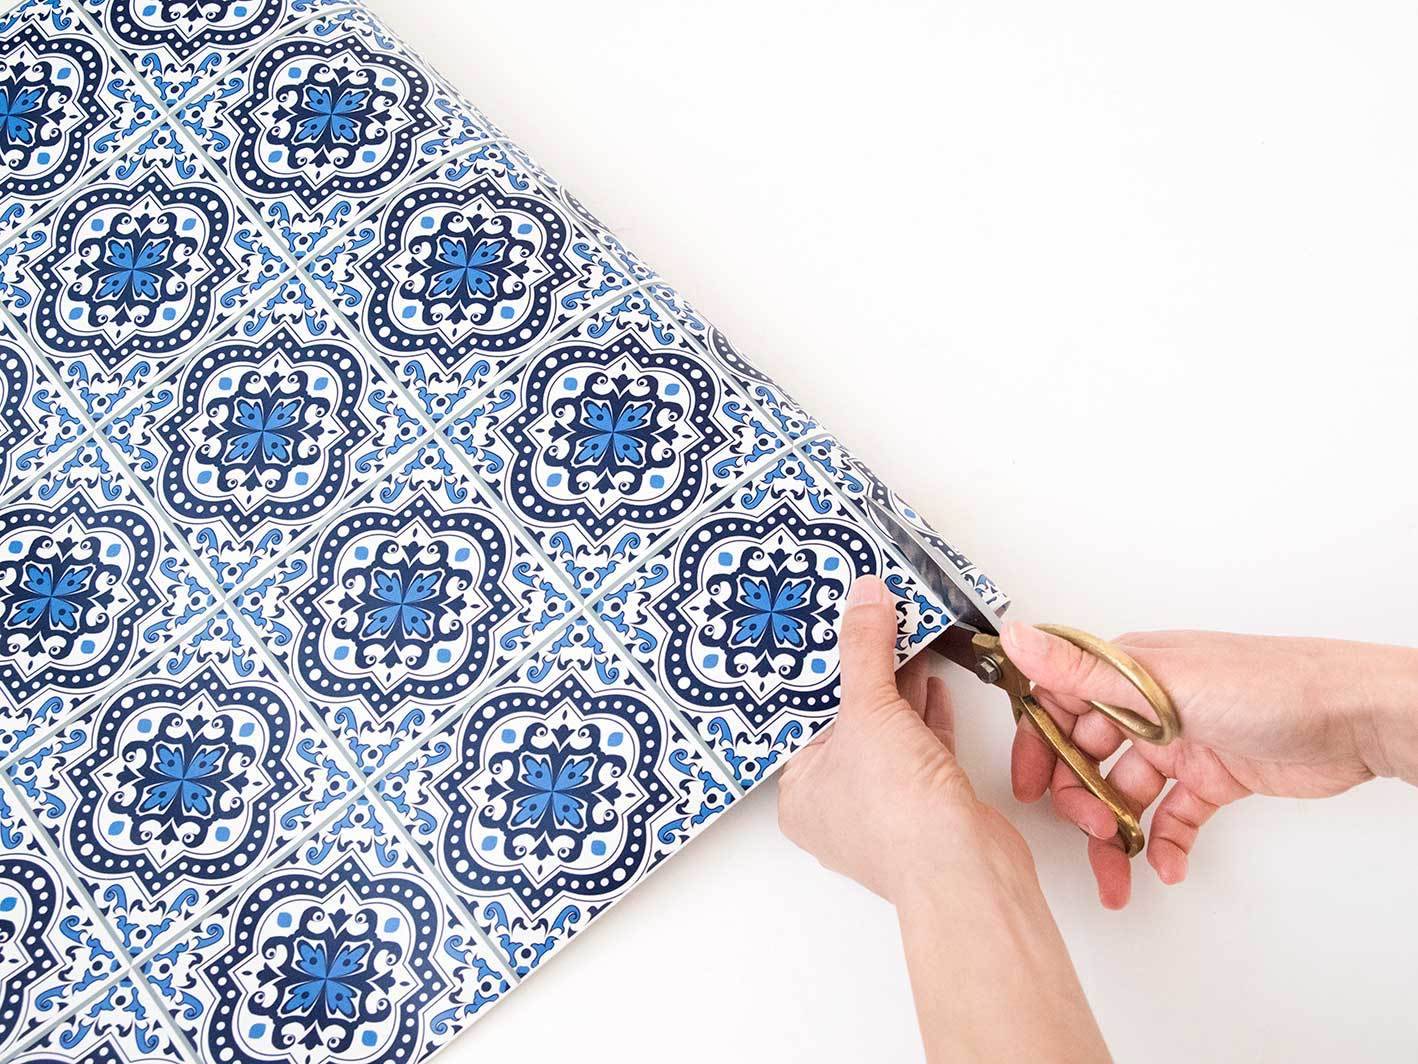
This is where your art wall organizer truly becomes a piece of art! Measure the front of your door and cut decorative contact paper or wallpaper to fit.
When you’re ready to apply it, measure twice and cut once—you want this to look perfect.
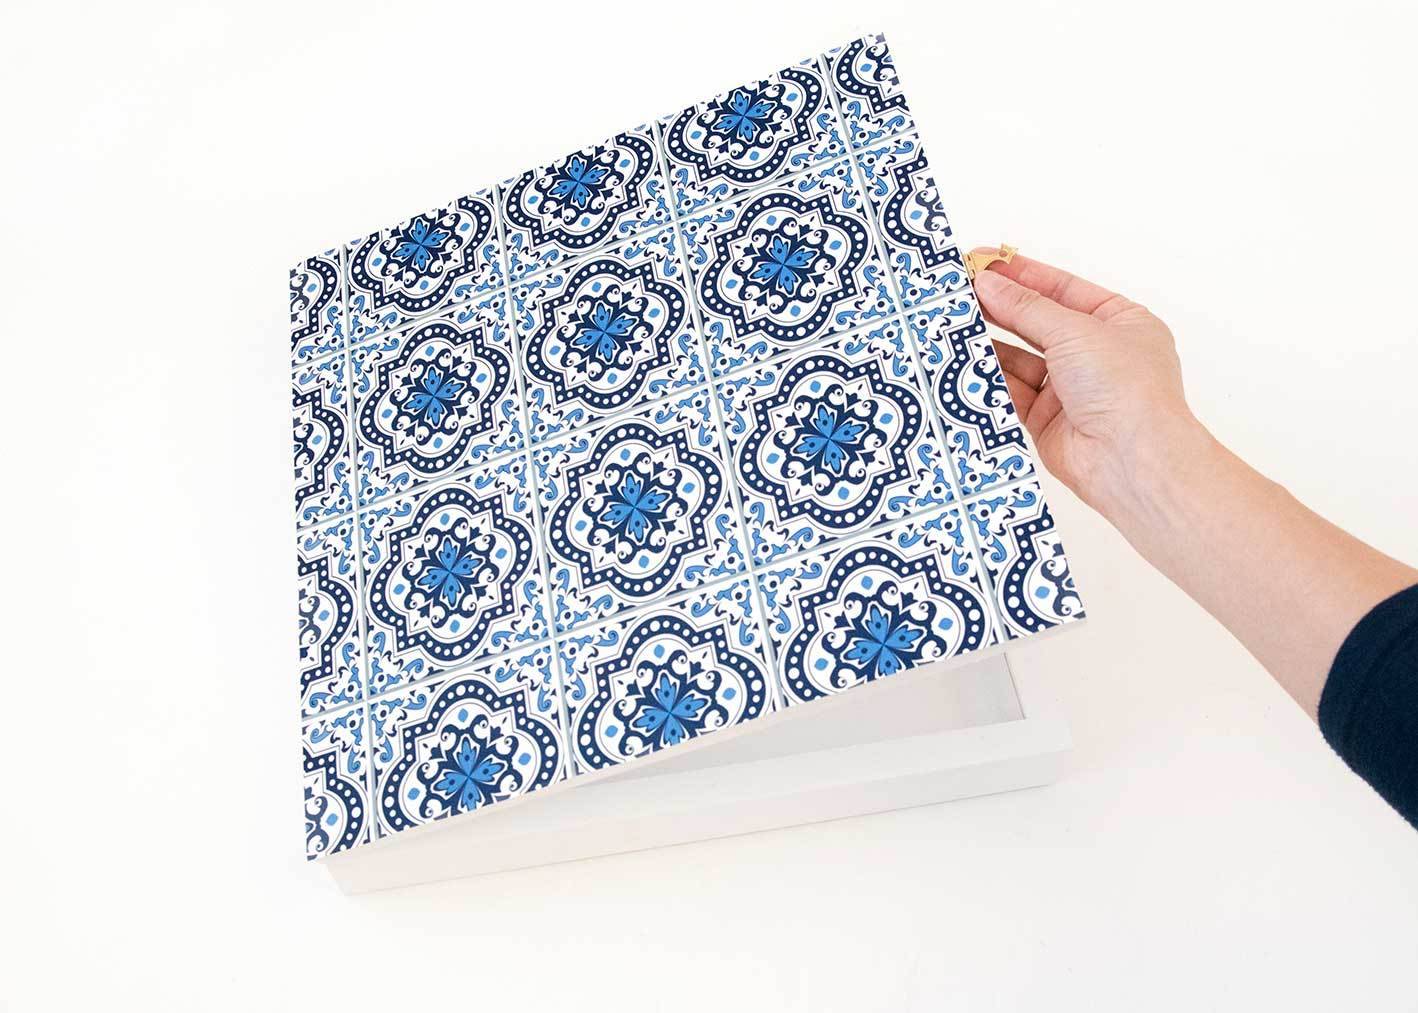
Apply the contact paper carefully to avoid bubbles. Start from one edge and smooth it down as you go, using a credit card or squeegee to push out any air pockets.
Your options here are endless: geometric patterns for a modern look, floral designs for something softer, or abstract art for a bold statement. Choose something that complements your bedroom’s aesthetic and makes you happy every time you see it.
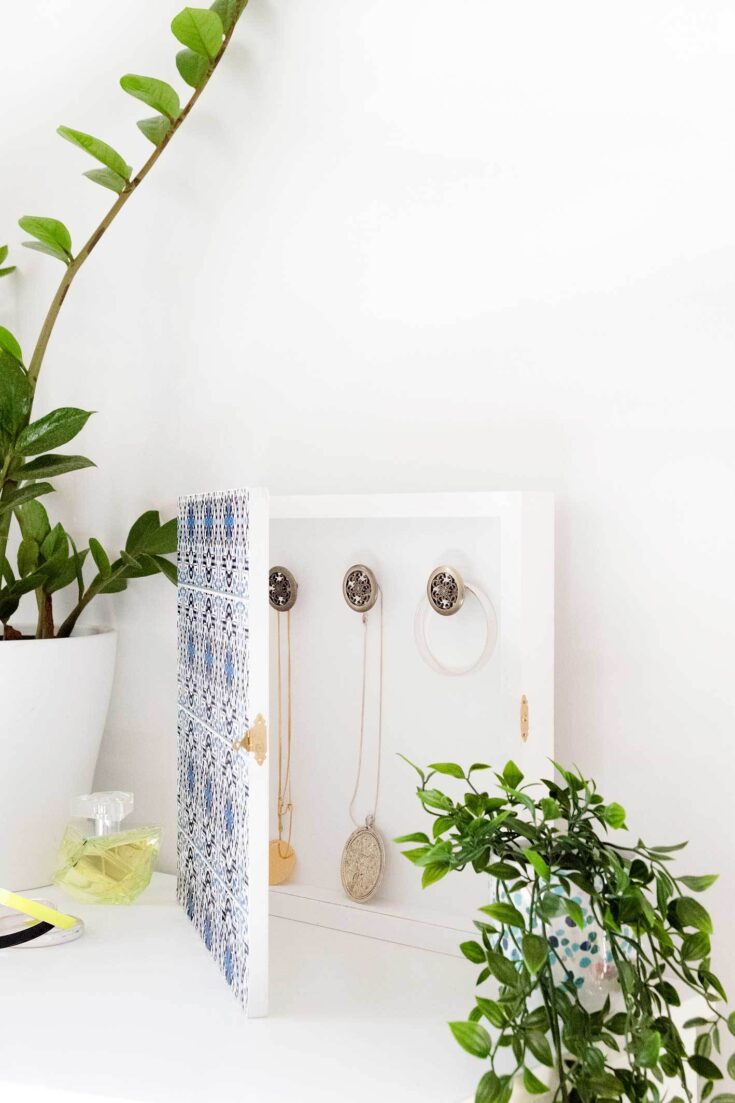
Install Interior Hooks
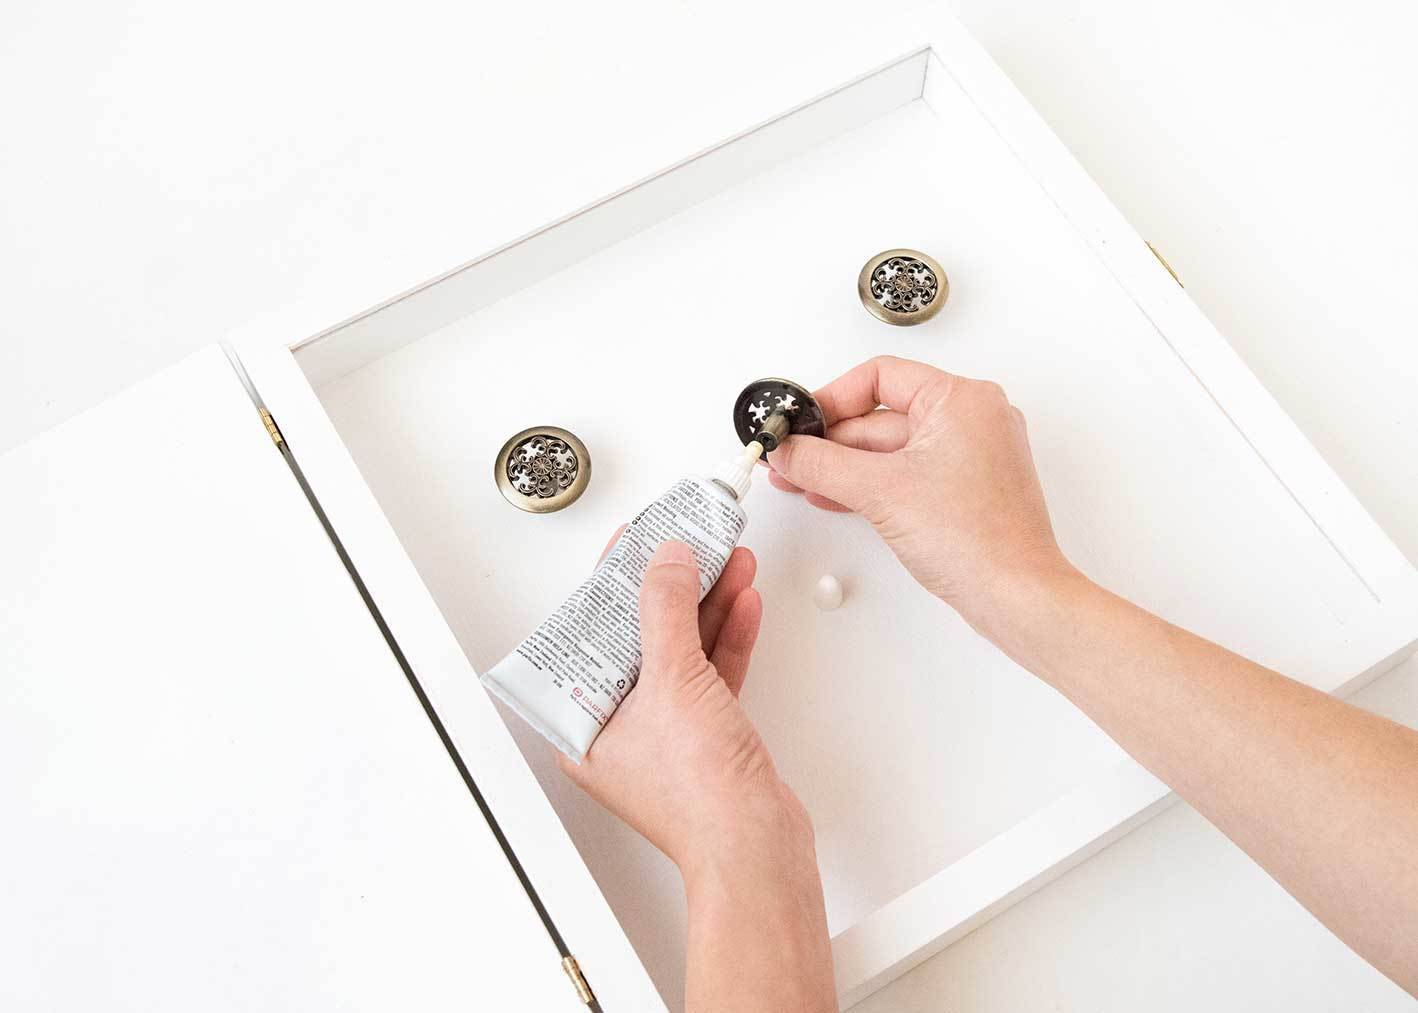
Now for the functional part! Space your hooks evenly inside the shadow box to accommodate different necklace lengths. Add decorative knobs near the top for shorter pieces like bracelets and chokers. Consider using different hook sizes for various jewelry types—some pieces might need larger, sturdier hooks.
Use strong adhesive or small screws to secure everything in place. Leave enough space at the bottom for longer necklaces to hang without getting tangled. Think about your jewelry collection as you plan the layout—if you have mostly long pendant necklaces, you’ll want to position hooks higher up.

Hang and Organize
Use picture hanging hardware that’s appropriate for the weight of your filled organizer. If you’re hanging it on drywall, wall anchors are essential for keeping everything secure. Hang your art wall organizer at a convenient height—eye level usually works well so you can easily see and access your jewelry.
Organize your jewelry by type or color, whatever makes the most sense for you. Hang your pieces, close the door, and step back to admire your handiwork. You’ve just created a beautiful piece of wall art that happens to be hiding all your jewelry!
Styling and Customization Ideas
Want to take this project even further? Match your contact paper to your bedroom’s color scheme for a cohesive look. You could create a whole gallery wall using multiple art wall organizers in different sizes—one for necklaces, one for bracelets, and another for rings and earrings.
Experiment with different frame styles to match your decor. A sleek modern frame works beautifully in contemporary spaces, while a distressed vintage frame adds charm to cottagecore or farmhouse bedrooms. For even more functionality, consider adding a cork backing where you can pin earrings, or line the interior with fabric to protect delicate pieces. You could even attach a small mirror to the inside of the door for a functional bonus.
The beauty of this project is that you can change the contact paper seasonally or whenever you want to refresh your look. It’s also a wonderful personalized gift for friends who love jewelry but struggle with storage.
Maintenance and Care Tips
Caring for your art wall organizer is simple. Dust the exterior just like you would any other wall art. Every few months, take a few minutes to reorganize the interior and untangle any pieces that might have gotten twisted together.
Over time, the hinges might loosen slightly from regular use, so keep a screwdriver handy to tighten them when needed. Clean the hooks occasionally to prevent any discoloration on your jewelry. If you have particularly delicate pieces, consider adding felt lining to the interior back panel for extra protection.
Frequently Asked Questions
What size shadow box frame works best?
An 8×10 or 11×14 frame works well for most jewelry collections. If you have an extensive necklace collection, go larger—or better yet, create multiple smaller organizers for different jewelry types. There’s no wrong size, as long as it fits your space and your collection.
Can I use this for earrings too?
Absolutely! To store earrings, add a piece of decorative mesh or cork to the interior back panel. You can hang stud earrings on the mesh or pin them to the cork. This works especially well if you create a dedicated earring organizer alongside your necklace storage.
Do I have to paint it white?
Not at all! Paint your art wall organizer any color that matches your decor. Metallics like gold, rose gold, or silver create a glamorous, jewelry-box feel. Deep jewel tones can make a bold statement, while soft pastels work beautifully in feminine spaces. This is your project—make it uniquely yours!
What if I don’t have woodworking tools?
Most hardware stores offer free cutting services for customers. Bring your shadow box frame and its measurements to the store, and they’ll cut the MDF to the perfect size. This makes the project accessible even if you’re working with a minimal tool collection.
How much weight can this hold?
A properly installed shadow box with quality hooks can comfortably hold several necklaces and bracelets. For heavier statement pieces, use stronger hooks and make sure you’ve mounted the organizer to wall studs or used appropriate wall anchors for durability. If you’re concerned about weight, test it before filling it completely.
Can I add a mirror inside?
That’s a brilliant idea! Attach a small mirror to the inside of the door using strong adhesive. This gives you a convenient spot to check how your jewelry looks before heading out. Just make sure the mirror isn’t too heavy for your hinges to support.
How to Make a Jewelry Organizer That’s Cleverly Disguised as Wall Art
Make this jewelry organizer that hides away as wall art! Stow away your necklaces and bracelets with the help of disguise.
3 hours
3 hours
Easy
Materials
- Wood shadow box frame
- MDF board
- Decorative contact paper or wallpaper
- 2 small hinges
- Jewelry box clasp
- Hooks or small decorative knobs
- Primer and white paint
- Sandpaper
- Saw
- Glue or strong adhesive
Instructions
Cut MDF to match your shadow box frame dimensions. Remove the glass from the frame, then sand both the frame and MDF board smooth.
Apply primer to both the frame and MDF board, then paint with white paint (or your preferred color). Let dry completely.
Connect the MDF board to the shadow box frame using two small hinges on one side to create a door that swings open.
Install a jewelry box clasp on the opposite side of the hinges to keep your art wall organizer securely closed.
Measure and cut decorative contact paper or wallpaper to fit the door. Apply it to create your “artwork” disguise.
Attach hooks or decorative knobs inside the shadow box to hold necklaces, bracelets, and other jewelry.
Mount your art wall organizer on the wall, fill it with jewelry, close the door, and enjoy your hidden storage!
Making Beautiful Storage Work for You
Creating this art wall organizer gives you the best of both worlds: beautiful art that enhances your space and practical storage that keeps your jewelry organized and protected. Whether you’re a beginner DIYer or someone with plenty of crafting experience, this project is completely customizable to match your style and skill level.
The hidden storage concept works beautifully for keeping your bedroom looking clean while ensuring your favorite pieces are always within reach. You’ve created something functional that also brings beauty to your walls—and that’s what great design is all about.
Ready to create your own hidden jewelry storage that looks straight from one of the great design studios? Gather your materials and give it a try this weekend. Your jewelry (and your bedroom) will thank you!
The post How to: Make a Jewelry Organizer That’s Cleverly Disguised as Wall Art! appeared first on Curbly.