When designing our media room or lower living space, our basement left a lot to be desired… especially when it came to the overall feel of the room. It was cold, the acoustics weren’t great, and the space just felt like a concrete box. Aesthetically speaking, my goal was to create a warm and inviting seating area where we could lounge, unwind, and watch TV. I wanted the space to feel like a cozy home theater. While part of my design plan included velvet wrapped upholstered wall panels to achieve that high-end home theater aesthetic, I was pleasantly surprised when they coincidentally helped the acoustics in this room. While my motive to install these velvet-wrapped acoustic panels was purely stylistic, I’m happy to report this easy upholstery DIY is a great way to address noise. Whether you’re renovating a media room, a music studio, or just want to soften the sound in your home, I’m sharing how we upholstered our own acoustic panels using velvet, to get that tailored, luxe look.
If you missed our basement media room, click through to take the complete tour. This space has slowly evolved over the years… it’s hard to believe I dyed and installed the pretty monochromatic wall of drapery over six years ago (see my tutorial on how to dye fabric to match your wall paint, here)! Most recently, we installed a realistic electric fireplace down here. Anyway- there are lots of fun projects in our basement to discover, but let’s get to the velvet wall panels.

When to Use Acoustic Panels
If you’ve ever been in a space with poor acoustics- where sound bounces and echoes, you know how distracting it can be. In our media room, I wanted sound to feel clear and immersive, without being overwhelming or harsh. By adding textiles, furniture, and a wall of drapery to this room- I knew it would drastically improve, but upholstering three oversized panels was an aesthetic choice that further enhanced the acoustics in our basement.

Here are some quick benefits of adding upholstered or DIY wall panels to your room…
- They add softness and texture to the space (especially when upholstered in velvet!).
- They create a layered look and fill negative wall space.
- They improve sound clarity and reduce echo.
- They provide a designer aesthetic, rather than an industrial look that many acoustic panels possess.

Materials and Supply List
Before you start, gather the following supplies. This project is relatively quick… it took us about an hour to upholster three panels. There are a couple ways to go about this. Since our primary goal was aesthetic, we took the easy way and upholstered a piece of framed art. Alternatively, you can purchase professional acoustic insulation, high density foam, and MDF to create a panel from scratch. The process is pretty much the same. I’m sharing our exact supply list:
- Framed artwork (we used an inexpensive large piece from IKEA)
- Cushion wrap upholstery batting
- Velvet fabric of your choice
- Spray adhesive
- Staple gun
- Staples
- Fabric Scissors

Step-by-Step: How to Upholster Velvet Acoustic Panels
1. Cut Your Fabric and Insulation
- If you’re using an existing piece of artwork, lay it face down on your fabric, cutting around the perimeter, leaving an inch for staple allowance.
- Cut your cushion wrap to the same size, matching the fabric.

2. Adhere the Layers Together
- Adhere the layers together with spray adhesive.
- Use more spray adhesive to attach the fabric layers to the cardboard backing of the artwork.
- Allow it dry completely before moving on.


3. Paint the Frame
- While the fabric adhesive is drying, paint the frame.
- I opted for the same navy paint color (Sherwin-Williams Naval) as the walls, since I was going for a monochromatic look.


4. Wrap and Staple
- Center your panel face-down on the backside of the fabric.
- Starting from the middle of each side, pull the velvet taut and staple it to the back.
- Work your way out toward the corners, keeping tension even.
- Fold the corners neatly, like wrapping a gift, and staple securely (like the below image).


5. Re-frame and Install
- Put the panel back into the frame and reassemble.
- Mount the panels directly to the wall in your preferred layout. We ended up adding a wire to the backside of the artwork for a more secure way to hang the panels, with the added upholstery weight.

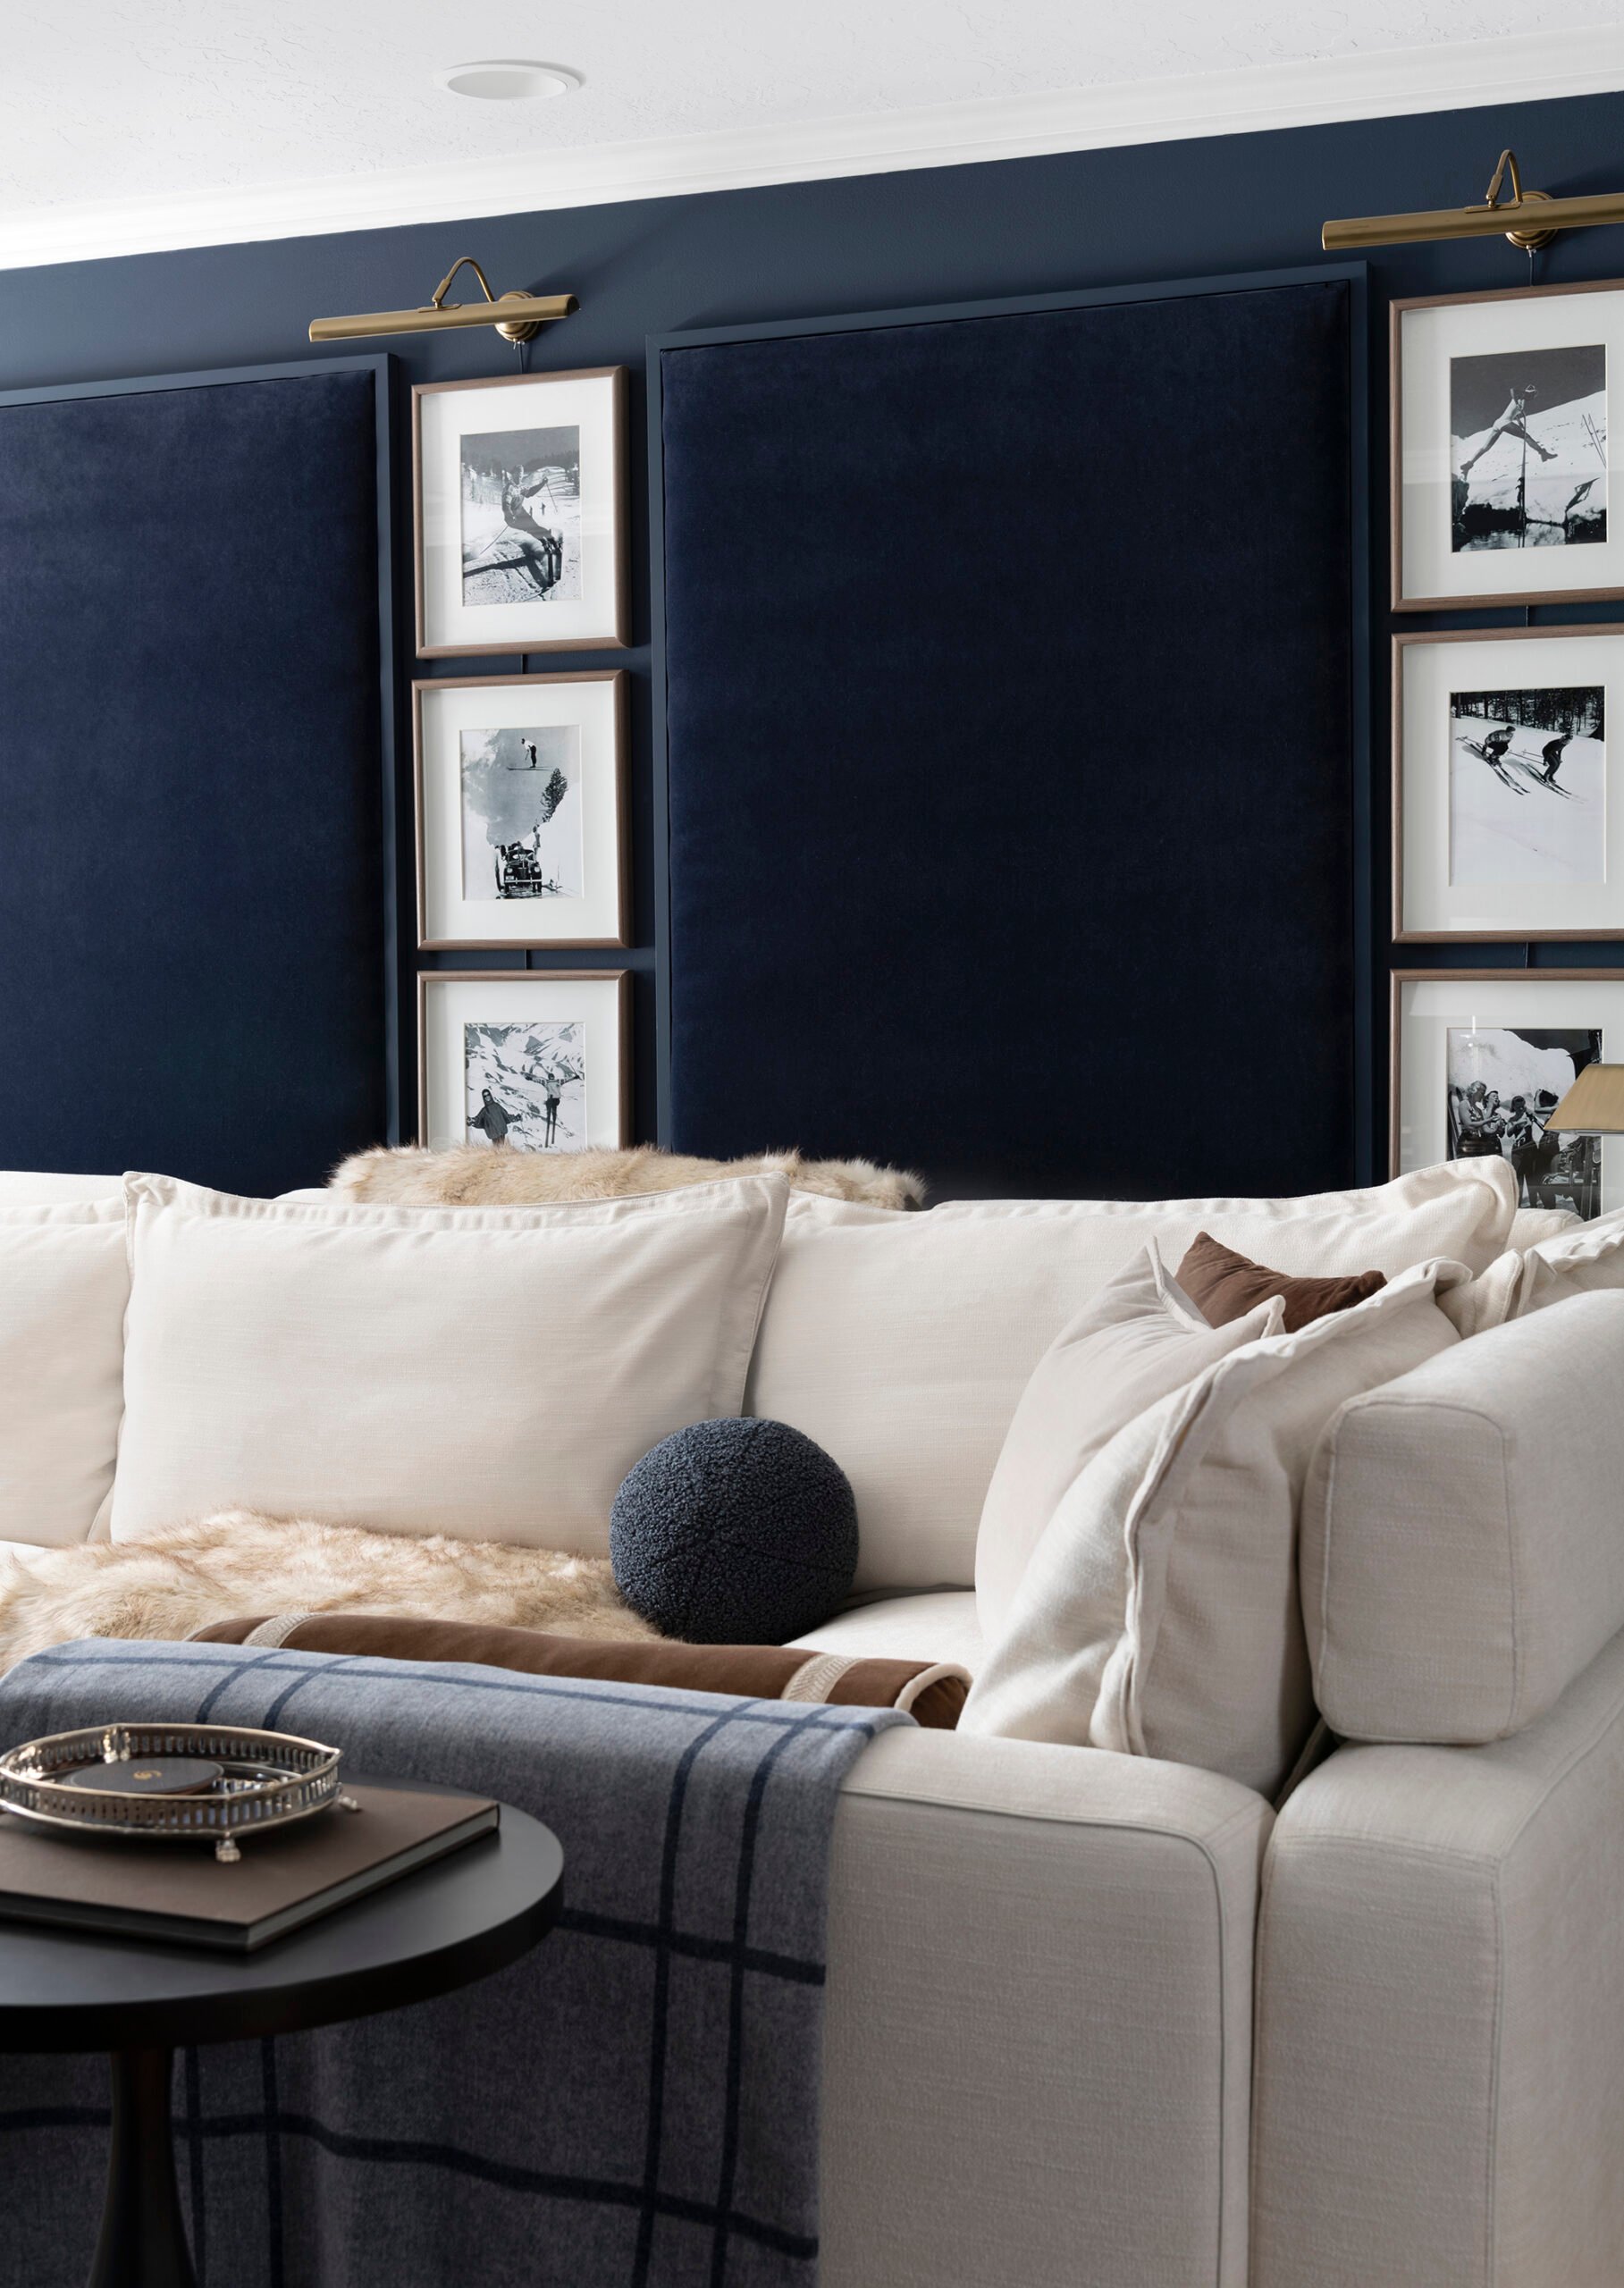
I’m really pleased with the way these panels turned out. Six years later, I wouldn’t change a thing! They have a clean, streamlined aesthetic, and you can’t go wrong with a monochromatic, color drenched look. They perfectly blend into the wall, while adding texture, softness, and acoustic benefits.

Styling Tips
Instead of scattering panels randomly, I planned a grid gallery wall layout for our media room that mimics panel moulding. The symmetry adds visual interest while keeping the vignette clean and polished. Here are my designer best tips if you’re going for a similar look…
- Create a gallery wall layout (it can be asymmetric or a grid pattern).
- Repeat the same size and shape if you’re installing multiple panels, for a cohesive, intentional look.
- Use the following fabrics for the best texture: cotton, linen, or velvet.
- Lean into a monochromatic palette if you’d like these to recede into your wall.
- Make sure your panels are oversized… small panels don’t look as nice and won’t work as well. Push scale, if you have the space.

FAQ
Velvet is both beautiful and functional- it absorbs sound well, drapes and upholsters nicely, and adds a rich, tailored look to any room.
It depends on the size and shape of your room. We installed three panels on a single wall in a grid pattern for a balanced aesthetic, with the added benefit of sound absorption.
I do! Check out this post on how to easily layout and install a gallery wall. I shared our exact process.
I use a handheld vacuum, lint roller, or you can deep clean these occasionally. I shared my detailed process on how to deep clean upholstery, here!

Related
Looking for more easy upholstery ideas, now that you have the supplies? I’ve shared quite a few over the years… these simple upgrades make a big difference. Check out some of my favorite past projects:
- How to Reupholster Antique Chairs
- How to Make a Basic Ottoman Look Custom and High-End
- DIY Upholstered Bed
- How to Upholster a Bench
- Banquette (or Headboard) DIY Back Cushion
- How to Upholster the Seat of a Chair
- A Brass Chiavari Chair Upholstery Makeover

Whether you’re renovating a home theater, creating a cozy media room, or are just looking for a way to improve acoustics with style in mind, these DIY velvet panels are a simple project that deliver a major visual impact. I love that they serve a functional purpose and look intentionally designed… like they were always meant to be a part of this room. If you tackle this DIY, I’d love to hear how it turns out. Let me know if you have any questions in the comment section below! This is a project I’ve received many questions about over the years, so I’m happy I was finally able to share a permanent tutorial.
The post How to Upholster Velvet Acoustic Wall Panels appeared first on Room For Tuesday.

