It’s the summer of DIY: This year, every other Friday, we’re revisiting some favorite, easy-to-tackle projects from the archives, like this one:
There’s no need to get fancy when it comes to propping open a door, but a wedge of wood is so much nicer than a mood-killing piece of plastic or rubber. Years ago, my mother returned from a trip to London with a traditional English turned oak doorstop made by David Linley, aka “the royal carpenter.” We have used his handiwork daily ever since, so I was delighted to come across its raffish American-made counterpart: a DIY door wedge created by Anna of Annabode & Co. for Home Made by Carmona. May it open doors for you.
Project and photography courtesy of Home Made by Carmona.
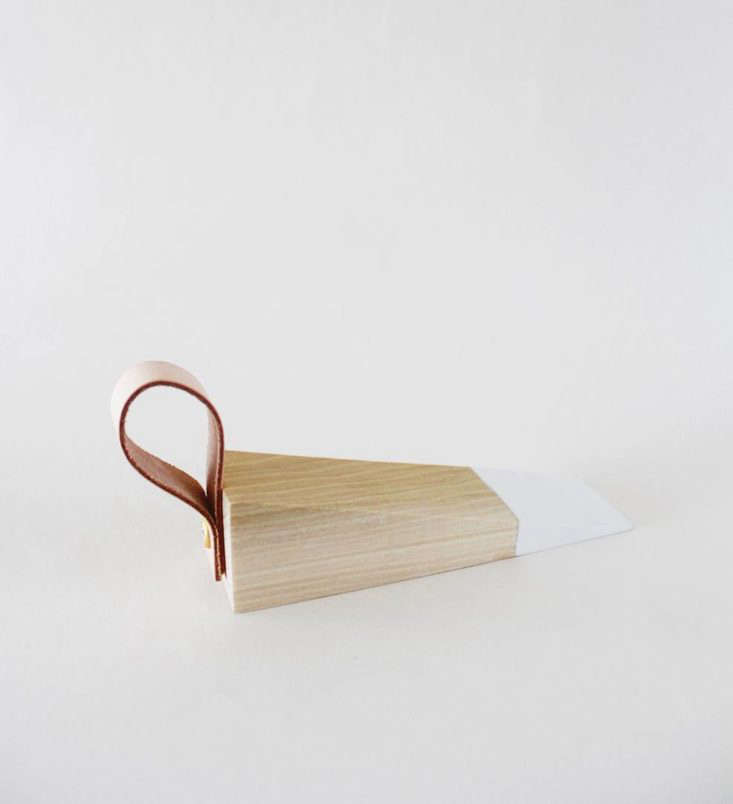
Above: The finished doorstop has a painted tip and an easy-to-grab leather tail.
Materials
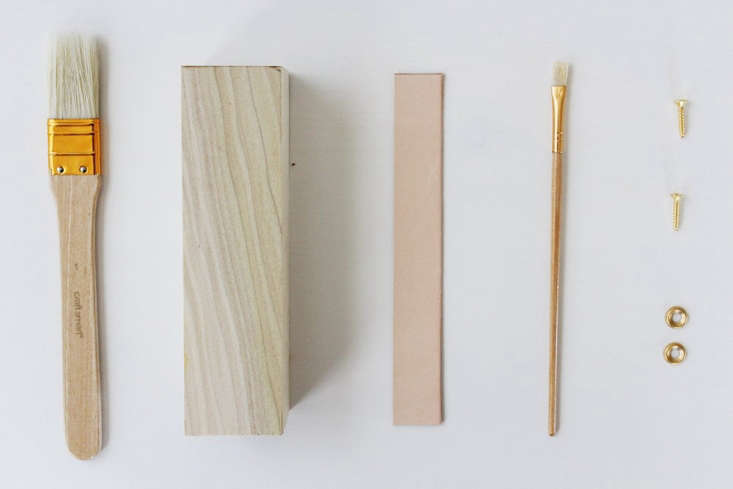 Above: Chances are good you already have what you need to make the door wedge.
- Piece of wood approximately 1.5 inches wide and 6.5 inches long. Use scrap wood or buy a length of wood, such as Home Depot’s Poplar Hobby Board; $5.34 for three feet (enough to make several doorstops).
- Length of leather, 1/2 inch wide and five inches long. Consider cutting up an old belt.
- Saw. “Use whatever kind of saw you have on hand,” says Anna.
- Sandpaper
- Drill
- Pencil and ruler
- High-gloss white paint
- Minwax Polycrylic, a protective finish.
- Paintbrushes
- One No. 6 brass washer. Home Depot sells five-packs of Brass Finishing Washers for $1.18.
- One No. 6 brass flathead screw. Home Depot sells four-packs of 6 3/4 inch Phillips Flat-Head Wood Screws for $1.18.
Instructions
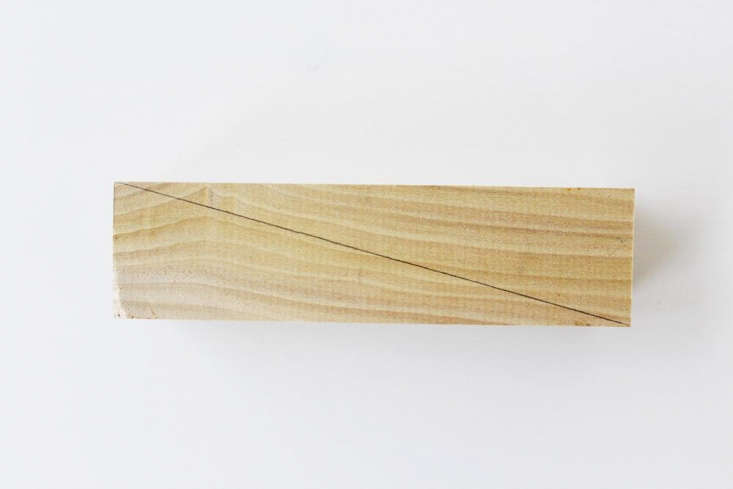 Step 1: Mark a diagonal line across the length of your wood, and saw in half. “If you start with a longer piece of wood, it’s easier to mark the six-and-a-half-inch length and saw the diagonal line,” advises Anna.
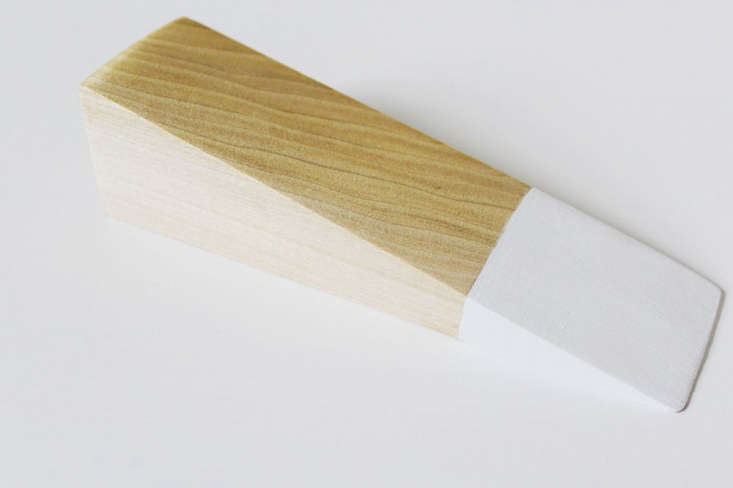 Step 2: Sand the wood, then mark (and tape off, if you like) the front section and paint white. Treat the rest of the wood with Polycrylic, but not the white tip (because the finish will yellow it).
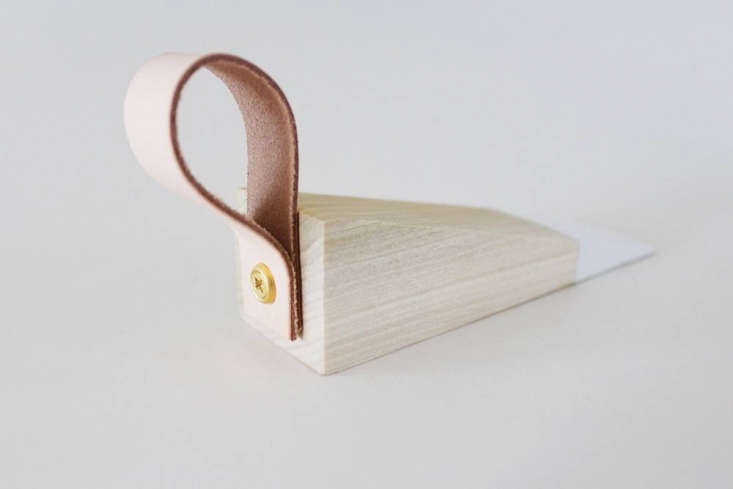 Step 3: Drill a small hole through the center of the back end—Anna suggests using the other half of the scrap wood as a base. Use the drill to attach a loop of leather secured with the washer and screw.
The Finished Look
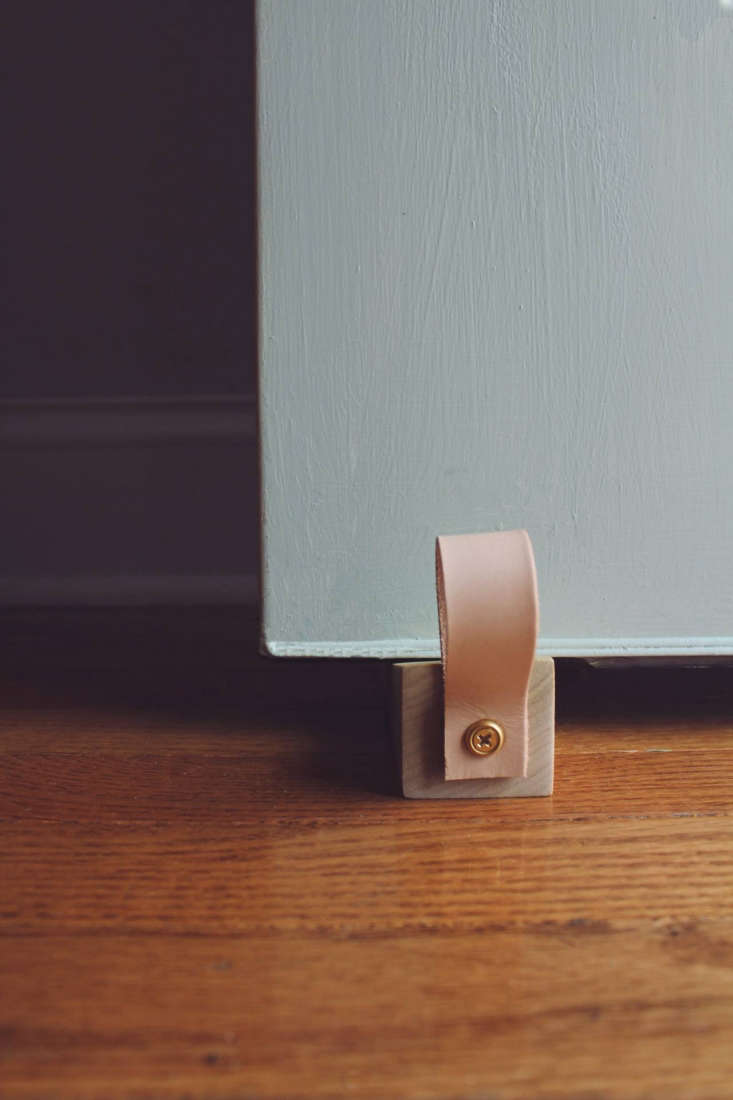 Above: Useful, unobtrusive, and nice-looking. For more details, go to Home Made by Carmona.
Keep creating. Here are three more DIY projects perfect for tackling in a weekend:
- The Shingled House DIY: Easy Burlap Shades (for Less Than $20 Each)
- Rehab Diary: How to Paint Furniture Like an Expert
- 3 DIY Cleaning Recipes for a Happy, Heathy Home
N.B. This post is an update; the original story ran on May 16, 2017.